• Skip to primary navigation
  • Skip to main content
  • Skip to primary sidebar

On the Cutting Floor: Printable pdf sewing patterns and tutorials for women

Online Printable PDF sewing patterns for beginners, crafts and printables for kids

  • DG PATTERNS STORE
  • SEWING
    • PATTERNS FOR SALE
    • FREE PATTERNS
    • TUTORIALS
    • REVIEWS
    • FUN PROJECTS
    • ROUNDUPS
    • PRINTABLES
  • FABRIC STORE
  • CRAFTS
    • PRINTABLES
    • KIDS’ CORNER
    • MACRAME
  • FOOD
  • MONEY
  • PATTERNMAKING SERVICES
  • ABOUT US
    • ABOUT ME
    • HOW TO DOWNLOAD THE FREE PATTERNS
    • WORK WITH US
    • CONTACT US
    • SITEMAP
    • TOS and Privacy Policy
    • CONTRIBUTE
    • Cookie Policy
  • SUPPORT OUR SITE!
Home » On the Cutting Floor’s Blog » Sewing Tutorial: Bias Binding 101

Sewing Tutorial: Bias Binding 101

December 27, 2015 by Daniela 1 Comment

Hi there,

Welcome to On the Cutting Floor.This is Sewing Tutorial: Bias Binding 101.


If this is your first time in our blog, remember to check our FREE SEWING PATTERNS page.

On that page you will find our collection of free sewing patterns for women, kids and men.

You can also visit our SEWING TUTORIALS and our SEWING REVIEWS.

We also have an ETSY STORE, where you will find unique and modern sewing pattern for women.

This is a tutorial to learn how to make bias binding on any pattern you want to take from homemade looking to professionally finished.


Enjoy!

Sewing Tutorial: Bias Binding 101

Materials:

The unfinished clothing you are making

Bias tape, either single fold or double fold.  You might also chose to make your own bias tape with the fabric you are already using on this project or another one that comes in handy 😉


  1.  Press the fabric flatDSC_1207
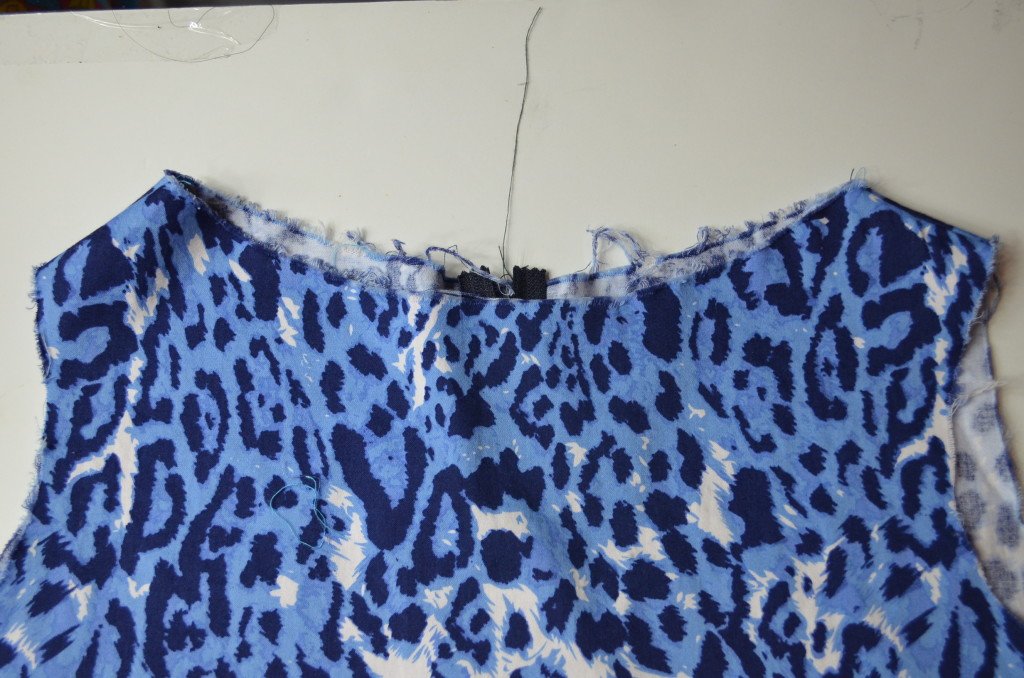
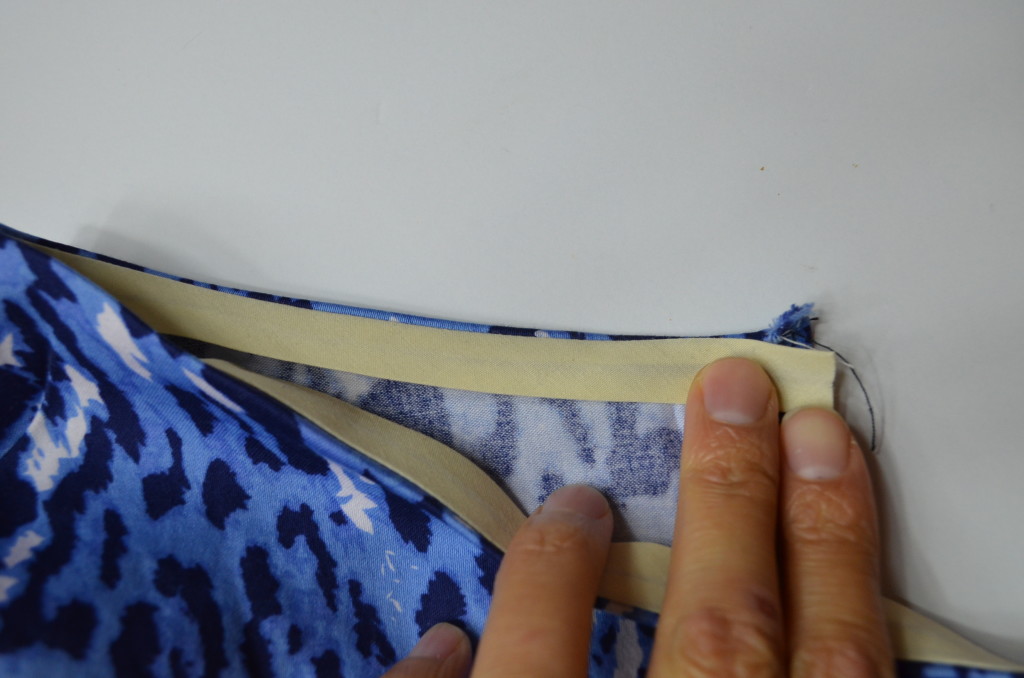
  2. Pin the bias tape to the surface you need to cover.
    DSC_1208
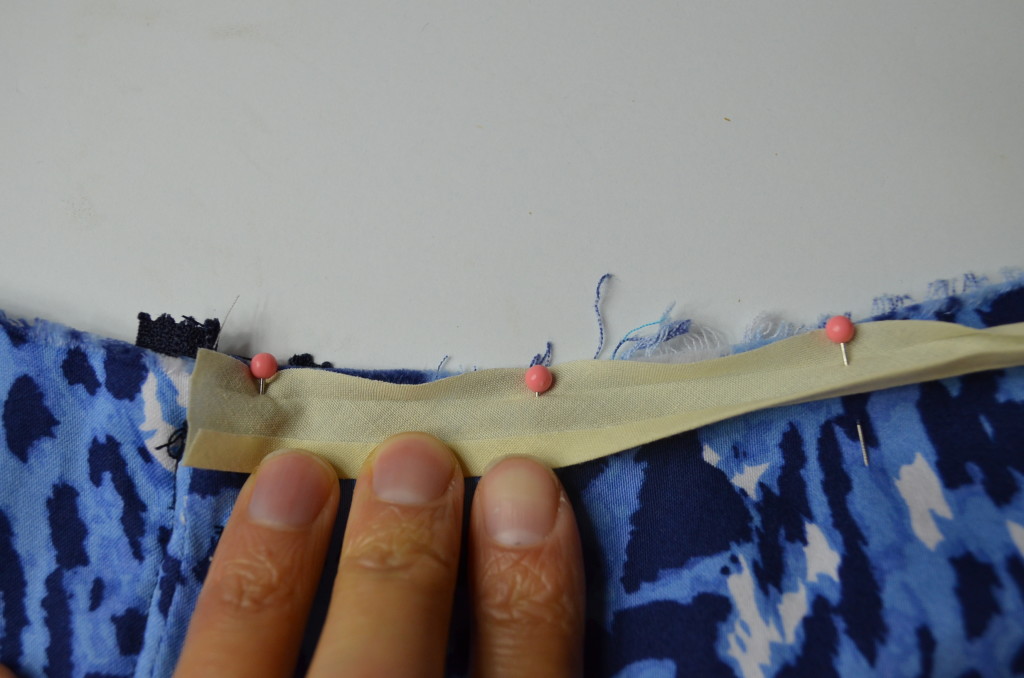
  3. Sew along the area within 1/4 inch from the edge.  Please note that if your pattern already includes seams allowance, you will need to trim the excess from the pattern before continuing to the next step.DSC_1210
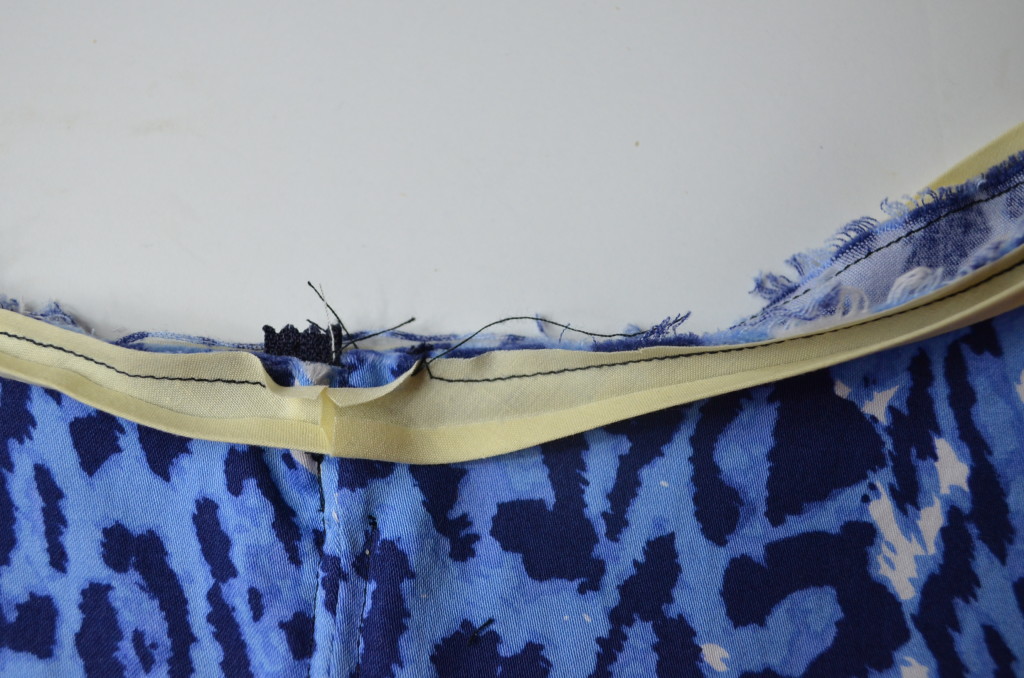
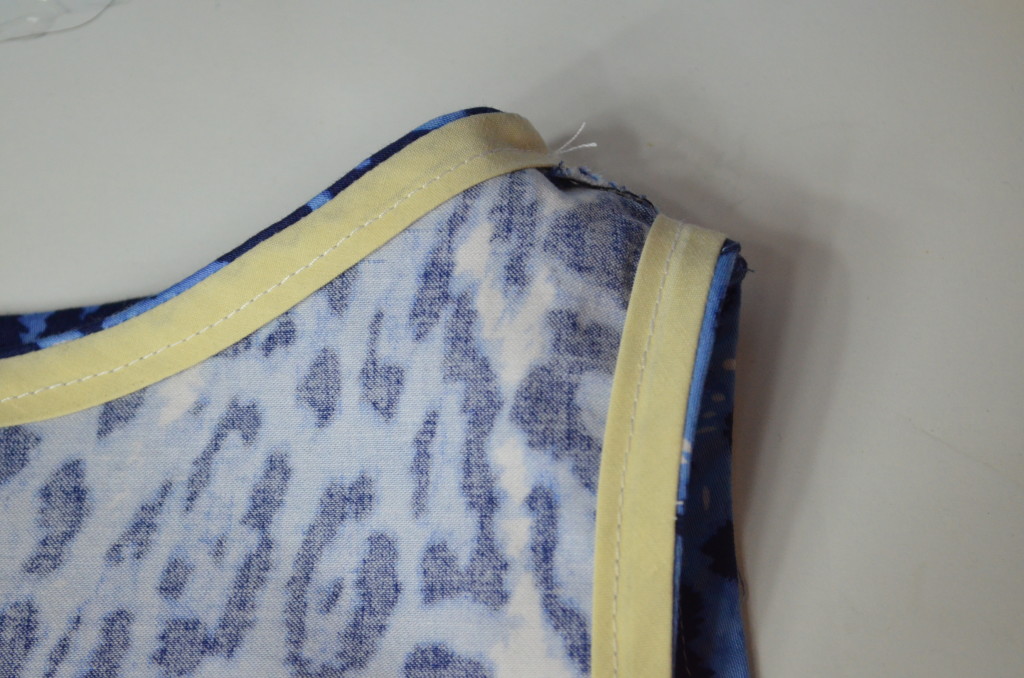
  4. Press the bias tape to the inside, leaving about 1/8 inch of the main fabric facing the other side of the project.
    right.DSC_1215
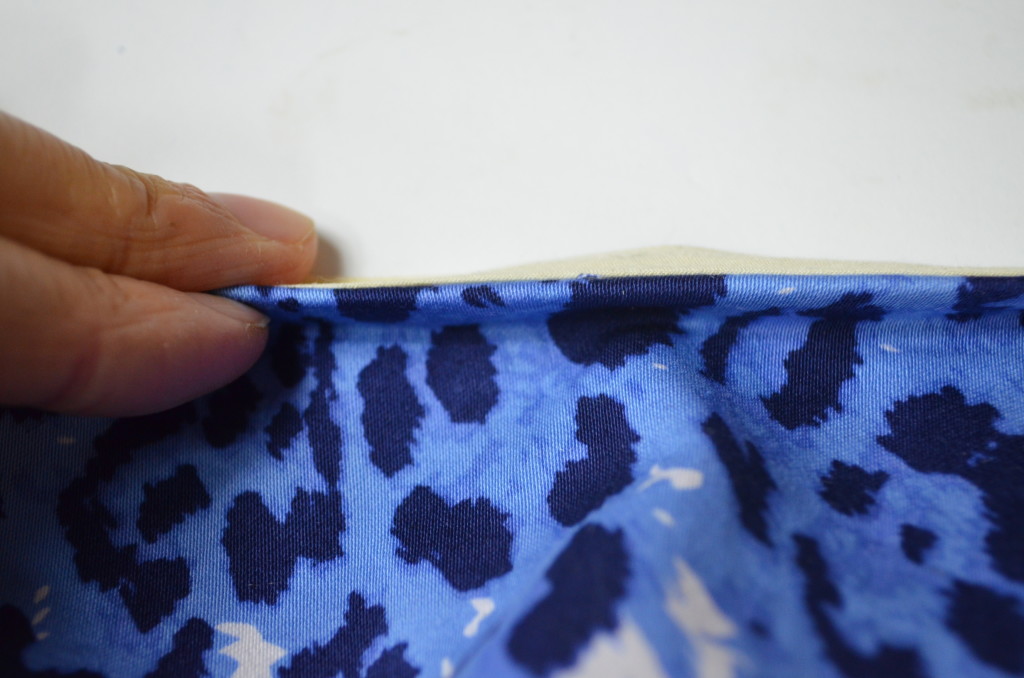
  5. Press again.  Make sure that the corners have been double folded.

DSC_1212

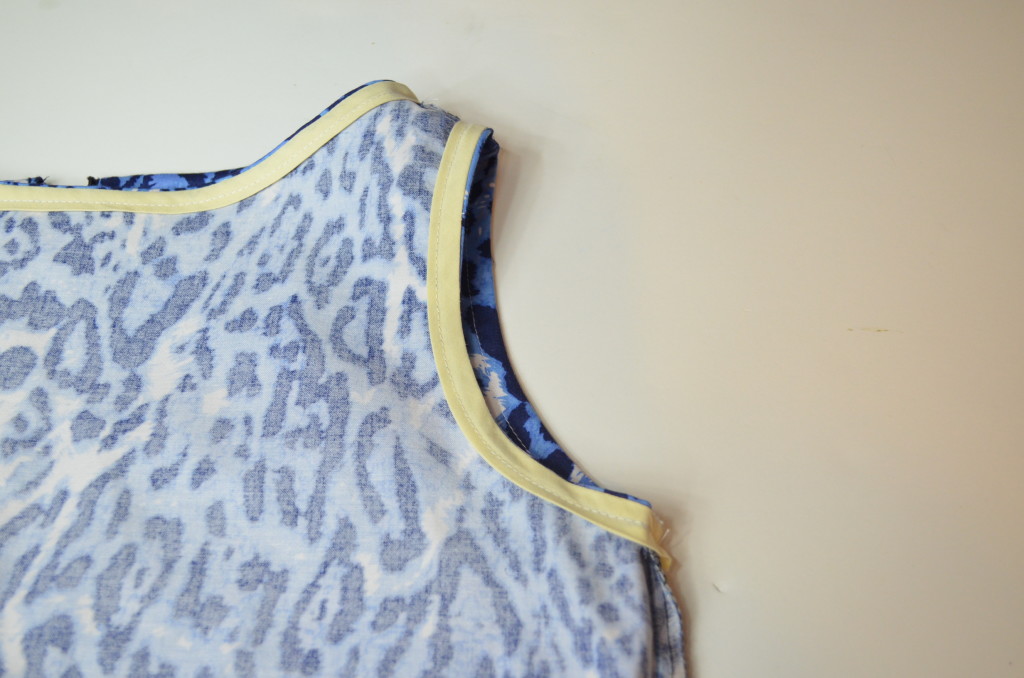
6.  Turn to the right side and sew along 3/8 inch the edge

DSC_1221


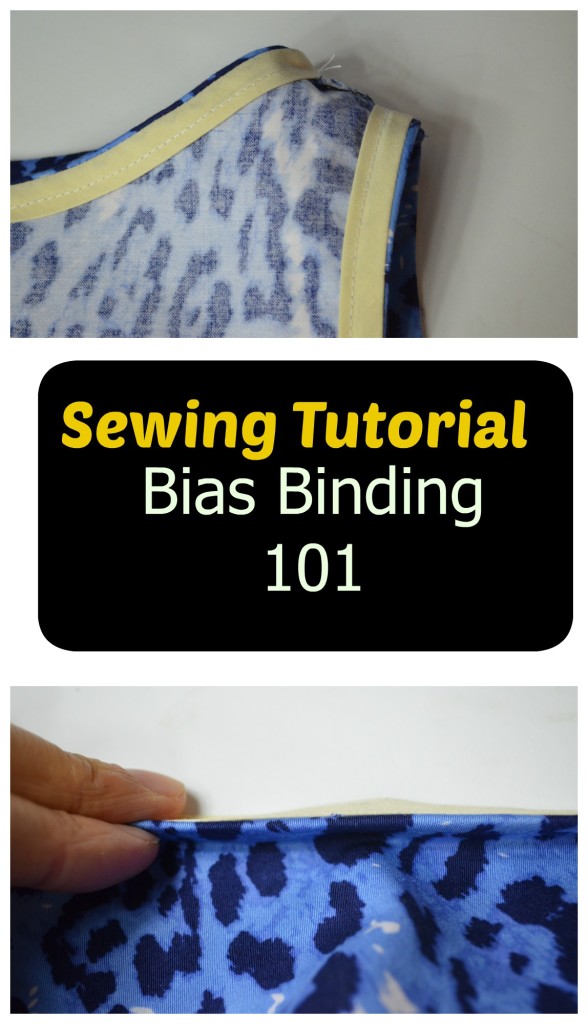
7.  And this is how it will look from the inside.


DSC_1224

I hope you have enjoyed this tutorial and found it useful.

DSC_1228


Happy Sewing!


Sewing tutorial bias binding 101

Filed Under: Tutorials Tagged With: 892

Reader Interactions

Comments

  1. Linda Martin says

    May 1, 2019 at 3:05 pm

    Thanks, this was very helpful!

    Reply

Leave a Reply Cancel reply

Your email address will not be published. Required fields are marked *

Primary Sidebar

RSS On the Cutting Floor: Printable pdf sewing patterns and tutorials for women

  • Petunia Skirt PDF sewing pattern and Tutorial
  • Standford Dress PDF sewing pattern
  • Ivonne Knit top PDF sewing pattern
  • The Cony Bouse PDF sewing pattern and sewing tutorial
  • FREE PATTERN: Basic Blouse
  • Advertise with Us!
  • Contribute – On the Cutting Floor
  • Income
  • SITEMAP

Copyright © 2025 · Genesis Sample on Genesis Framework · WordPress · Log in