Get Any PDF pattern 50% OFF today!
Use coupon code:
DGPATTERNS
on our Etsy store
BUY NOW
A FEW IDEAS?
On the Cutting Floor: Printable pdf sewing patterns and tutorials for women
Online Printable PDF sewing patterns for beginners, crafts and printables for kids
Hello there,
Thank you for visiting On the Cutting Floor today. This is the Easy T-shirt tutorial
On that page you will find our collection of free sewing patterns for women, kids and men.
You can also visit our SEWING TUTORIALS and our SEWING REVIEWS.
We also have an ETSY STORE, where you will find unique and modern sewing pattern for women.
You can also sign up for our newsletter on the sidebar of this post, so you will never miss a post!
Pin the shoulders and sew along.
Place the front and back together again and sew the sides of the t-shirt, including the sleeves.
Hello there,
Thank you for visiting On the Cutting Floor today. This is the Amy Skirt Tutorial
On that page you will find our collection of free sewing patterns for women, kids and men.
You can also visit our SEWING TUTORIALS and our SEWING REVIEWS.
We also have an ETSY STORE, where you will find unique and modern sewing pattern for women.
You can also sign up for our newsletter on the sidebar of this post, so you will never miss a post!
TUTORIAL
FRONT PANEL:
5. Repeat the same procedure from the back side of the skirt with the front, except for the left side seam should stay opened by 7 inches from the bottom.
The seams here must be top stitch in the same way the back side of the skirt was before.
6. Place front and back skirt pieces together, right sides facing and sew along the sides.
7. Fold the elastic in two and sew it together.
8. Pin the elastic to the to of the skirt. It must not stretch.
9. Sew along the top, 1/4 inch away from the seam.
10. Turn the elastic to the inside of the skirt. 11. Insert about 1/4 inch of the skirt as well, then stitch on the dish
12. Finish by making a 1 1/2 inch hemline on it.
And that it is ready! I hope you like it as much as I do 🙂
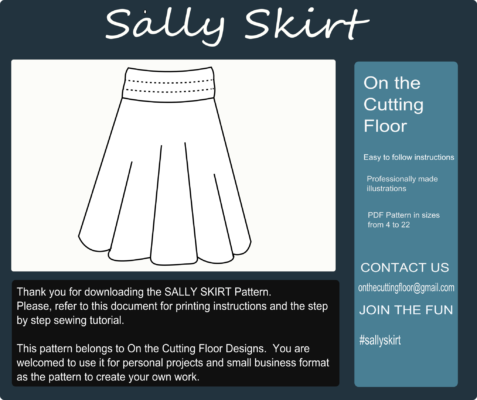
This is the post for Tutorial: How to make the Yoga Skirt and Sally skirt
Both patterns share the same tutorial since there is one difference between them: the volume of the skirt. Sally is an A-line skirt, hence there is less volume; while the Yoga skirt is a semi circle skirt pattern.
If this is your first time here, please take some time to check our FREE Sewing Patterns sections, our Sewing Tutorials and our Sewing reviews as well.
You can also enjoy checking our etsy store to see a collection of modern and unique PDF printable sewing patterns and tutorials.
Click here to visit our store now
You would also like to sign up for our newsletter. Then, you will receive a weekly email with the newest sewing pattern, tutorials, reviews and giveaways!
Place the waistband pieces together, right sides facing.
2. Sew the sides.
Skirt:
3. Place front and back skirt pieces together, right sides facing and sew the sides.
4. Press the seams flat.
5. Turn the skirt to the right side.
6. Place the bottom of the of the waistband on the skirt opening. The wrong side of the skirt MUST BE FACING the right side of the skirt.
Sew the waistband and skirt together.
7. Fold the top of the skirt waistband to the inside. You must fold 1 inch from the top (follow the waistband corner mark to do this)
8. Finish by making 1/2 inch hem on the skirt.
I hope you have enjoyed this tutorial and remember to share this post with your friends, relative and loved ones.
We all really appreciated!
I love this pattern because it is easy to make and very flattering. You can decide to use a solid color fabric for a classic look or a funky and fun fabric for a casual pair of trousers.
This Free Sewing Tutorial will show you a step by step way to make the casual pants.
If you like our patterns, remember to check on our PDF sewing patterns area, our Free Sewing Tutorials and our Sewing reviews. You will find lots of great information about sewing for beginners with easy to make patterns.
You can also like to visit our Etsy store to find modern, unique PDF printable sewing patterns and tutorials. Or you can join our weekly newsletter to learn more about our newest PDF pattern released, roundups and giveaways.
Enjoy!
Place the pockets on each pant leg. Follow the marks on the printed pattern –
Place front and back pant leg pieces together and sew along the sides, including the pockets –
Attach both legs by sewing along the crotch area.
Waistband: Place front and back waistband pieces and close the sides –
Place the waistband with the pants. Sew along the top and attach it to the pant legs by top stitch the sides –
Hand Stitch the bottom of the waistband to the pants, leaving a 4 inch opening to insert the elastic. –
Insert the elastic on the waistband area and close the opening.
Finish by making the hemline of your pants 1 inch.