Hello everyone,
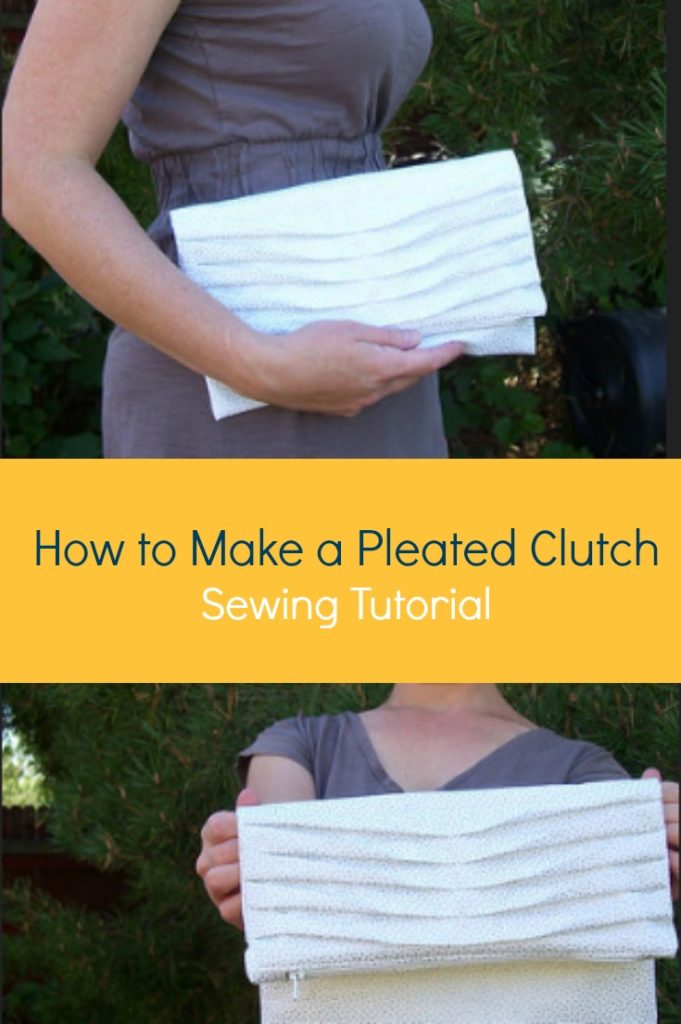
Thank you for visiting us today. This is the post to learn How to Make an Easy Pleated Clutch
Melissa from Mahlica Designs has created this cute and easy sewing tutorial for us. If you want to get great sewing inspiration, check on Melissa’s instagram
Follow the step by step sewing tutorial here:
Finished bag: 11″ wide by 12″ tall
Supplies:
3/8 yard each for main and lining fabric; heavy weight fusible interfacing or fusible fleece; 9in zipper, basic sewing supplies.
Cut:
*2 Lining pieces: 12in X 13in
* 1 Interfacing/fleece piece: 11in X 24in
* 1 Main piece: 12in X 33in
* 4 zipper covers: 2in X 1.5in from main fabric (or lining for a contrast)
* 1/2 inch seam allowance used throughout.
Prepare your pieces
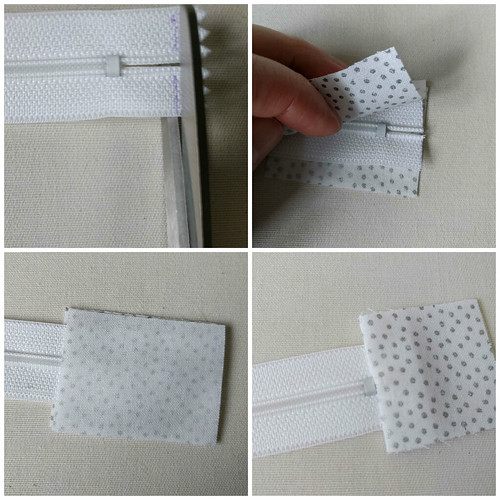
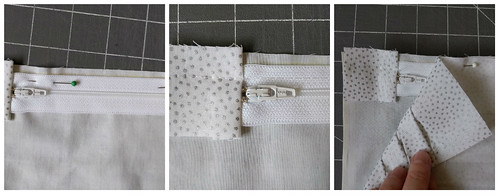
- Trim away excess zipper tape, leaving 1/2 in above and below the zipper stops. Sandwich and center the zipper end between two of the cover pieces, right sides facing the zipper, raw edges lining up. Sew using a scant 1/2in seam allowance, being careful to not hit the metal stop. Open and press. Repeat for other end of the zipper.
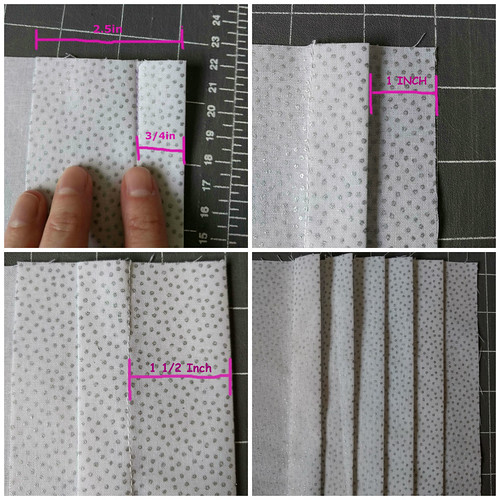
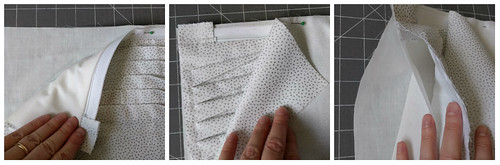
- Make the tucks in the main fabric.
- First, make your first fold, wrong sides together, 2.5in down from one of the short edges. Press. Sew 3/4in away from (and parallel to) your folded edge. Press. You should have 1in of fabric below your first tuck.
- Second, your next fold, wrong sides together, 1 1/2in away from the stitching line you made in step A. Press and sew 3/4in from your folded edge. Repeat until you have a total of five tucks.
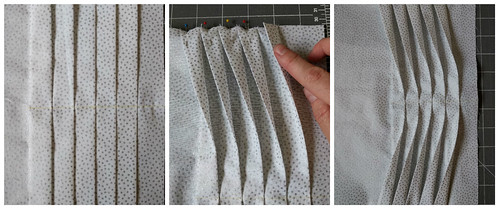
- Press tucks toward the short edge. Mark and sew through the center of your tucks. Alternately you can hand tack the tucks down at the lower edge.
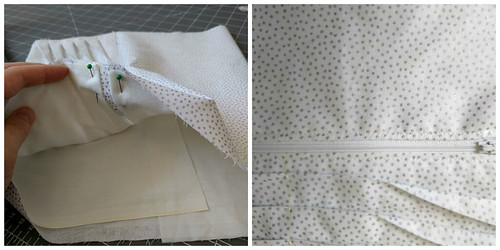
- Center and fuse your fleece or stabilizer to the wrong side of your main fabric. The stabilizer is sized smaller to reduce bulk in your seams.
- Fold and pin tucks up on outer edges. The tucks will not line up squarely with the edge, that’s o.k., it’s more important to keep the piece laying flat. Baste in place using a 3/8in seam allowance.
Assemble your clutch
Use a 1/2 in seam allowance throughout.
- Mark a line 1/8in down from top edge on right side of both lining pieces. Position the zipper right side up along this line. Pin in place and using a zipper foot baste zipper in place. Position the main fabric on top, right sides facing. The zipper is sandwiched between the layers. Stitch 1/2in from edge moving zipper pull out of the way as needed. Carefully press the lining and main pieces away from the zipper.
- Place second lining piece right side up. Position unsewn zipper edge right side up on top of lining. Edge of zipper tape should be along the 1/8in marking. Pin and baste just as before. Place your piece with main fabric and zipper right side up. Fold bottom edge of main fabric up to top edge, right sides together. Pin in place. The zipper tape is now sandwiched between the main and lining fabric. Stitch 1/2in from edge moving zipper pull out of the way as needed.
- You now have a tube with lining pieces not attached to each other yet. Turn out the layers so right side of main fabric is facing out. Pin lining away from zipper and topstitch through the layers (main and lining) about 1/8in away from exposed zipper teeth on both sides of the zipper.
- Turn tube out again so right sides are facing each other and wrong sides are facing out. Open your zipper almost all the way. Line up the topstitching lines and pinch the zipper cover toward the lining side. Pin along outside edges.
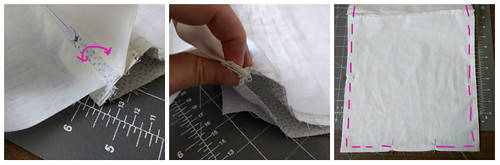
- Stitch down each long edge and across bottom, leaving a 4in opening at the center bottom of the lining. Sew slowly as you go over the bulk at the joining of the main, lining and zipper covers. Trim the corners and grade some of the bulk at the center join.
- Pull the clutch right side out through the opening in the lining and open zipper. Use a turning tool to push out the corners. Handstitch the lining closed.
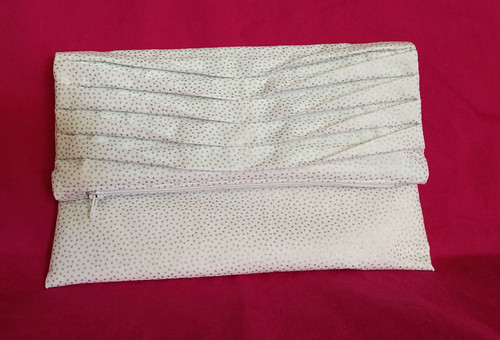
Now rock your new fold over clutch!
How to Make an Easy Pleated Clutch


There’s nothing quite like a home sewn stylish bag:)
That is so true 🙂
Ooh I like this, and those pleats look beautiful.Thanks for a great tutorial!