Hello there!
Welcome to On the Cutting Floor 🙂
On the Cutting Floor: Printable pdf sewing patterns and tutorials for women
Online Printable PDF sewing patterns for beginners, crafts and printables for kids
Hello and Welcome to On the Cutting Floor, this is the Craftsy Class Review: Design your Own Bags

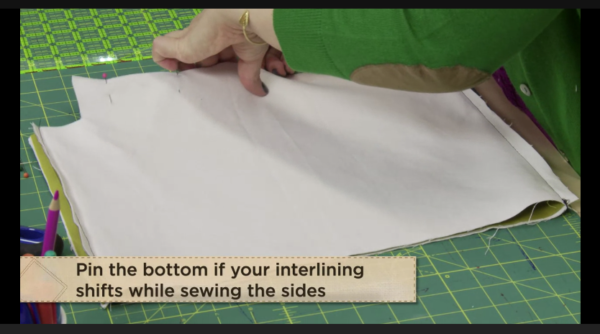
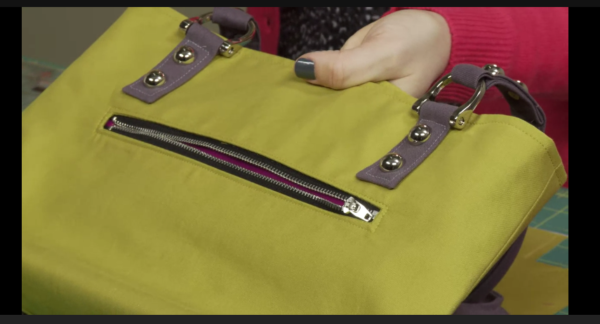
Craftsy Class: Design your Own HandBags.
On that page you will find our collection of free sewing patterns for women, kids and men.
You can also visit our SEWING TUTORIALS and our SEWING REVIEWS.
We also have an ETSY STORE, where you will find unique and modern sewing pattern for women.
You can also sign up for our newsletter on the sidebar of this post, so you will never miss a post!
I have always had the desire to make my own, stylish bag. No ugly polyester stuff, you know.
However, I turn to put the projects off…for a while. I feel overwhelm by the details, not knowing where to start. Where do I get my materials? what do I need to buy? What type of fabrics work better?, etc.
So, I decided to purchased this class created by Brett
The topics that will cover are:
Planning your design

Constructing the basic exterior
Construction basic lining
Pockets
Handles and straps
Zippers
Closures and hardware

Shape variations
What I liked:
What I did not like
I must say, I am satisfied with the class, but I felt that I was missing something.
Even though Bret is able to give all the details to create your own bag, the idea of the class is that you ”design your bag”, but the class is a beginners level. This is, for me, a bit contradictory.
If it is a beginners class, I would expect to see a pattern included. I know; to re-create the bags shown can’t be too difficult, but it will depend on the level of expertise of the sewist.
IF you feel that you need an extra help with a handbag pattern or tutorial, you can check this roundup I made a few months ago
I would recommend this class to someone who has made a few bags in the past and would like to perfect the techniques.
Design your own bag is a class that you can purchase now for 19.99.
Disclaimer: This post contains links to my affiliate program. By clicking on the links I might get a small commission out of purchases. However, the opinions expressed here represent my personal, honest opinion about the class.
Is there any Craftsy Class that is on your wishlist now?
Thanks for reading this review and do not forget to visit us again 😉
Hi there,
Thanks for visiting us today.
Shopping online has become more and more prevalent these days. Specially when you want to find something different than what your local store can provide.
This is a trend that has been incorporated into the fabric shopping behavior of every single sewist out there.
It is easier than ever, convenient and the prices are very competitive.
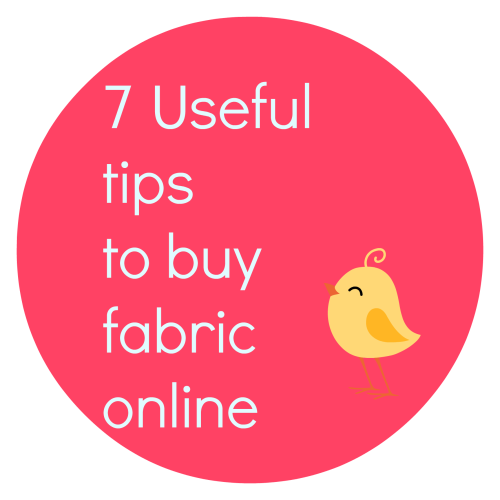
There are a few things to keep in mind when buying fabric online:
1. Know your fabrics: The options and variety can be overwhelming, I know. When I started buying fabrics online, I decided to stick with the types of textile I knew. Then, I purchase a few books to learn more about fabrics and I felt confident enough to purchase a wider variety.
2. When unsure about the fabrics, purchase a swatch: It will make your life easier.
3. Check shipping options: I find this part very important. The shipping costs on a parcel are a deal breaker for me. I always double check the rates, the options and the extra costs that they have. Check before getting all excited! (trust me)
4. Check the fabric amounts: Some stores will ask the yardage amount you want to purchase, some will ask for meters. However, more independent fabric stores online will ask for a specific quantity; units you want to purchase (it can be 1/2 yard, 1/4 yard, etc). Check what will be the equivalent per unit purchased.
5. Look for a blog link to check on ideas for projects: Most fabric stores these days provide a blog with great tips, tutorials and projects showcasing their fabrics. This will give you a better idea of the overall quality of the fabrics you want to purchase and useful ideas for future projects.
6. Youtube videos: Similar to number 5. This has become more and more prevalent in fabric stores. The video tutorials are a great way to check on the fabric quality that the store is offering. Plus, there are great tips and ideas on them!
7. Find bloggers who often talk about its fabric store choices. It is always good to have a great recommendation before buying online 😉
Here is a short list of my favorite fabric stores online. They have been always helpful t answer my questions and the shipping rates (and time) are very convenient:
Please, click on the names to be re-direct to the online store:
Thanks for visiting us today!
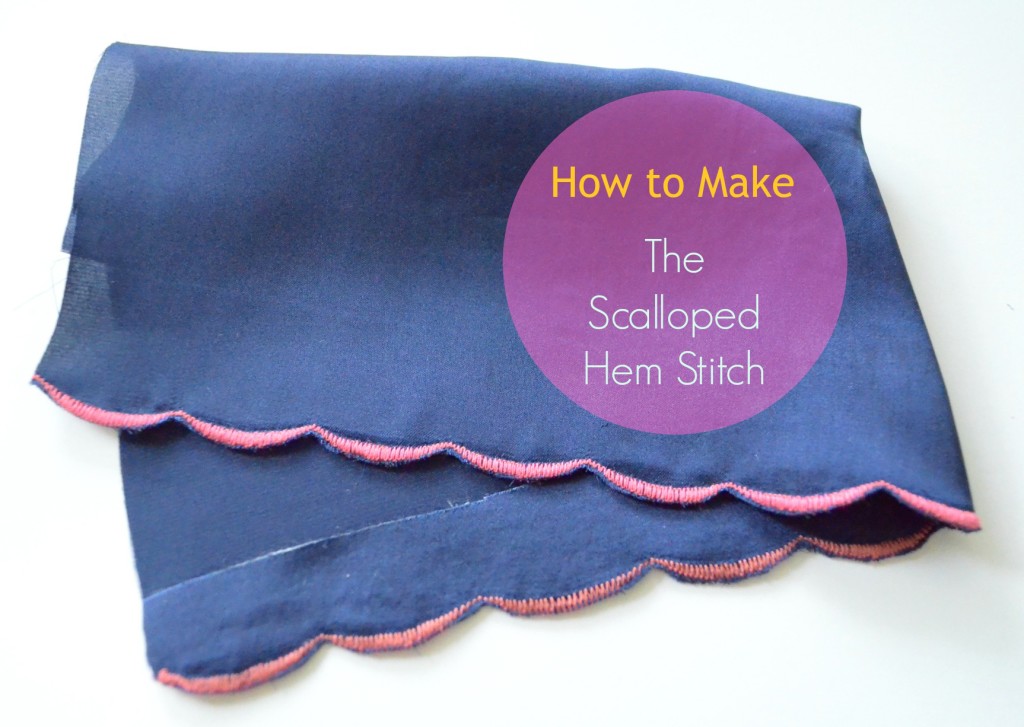
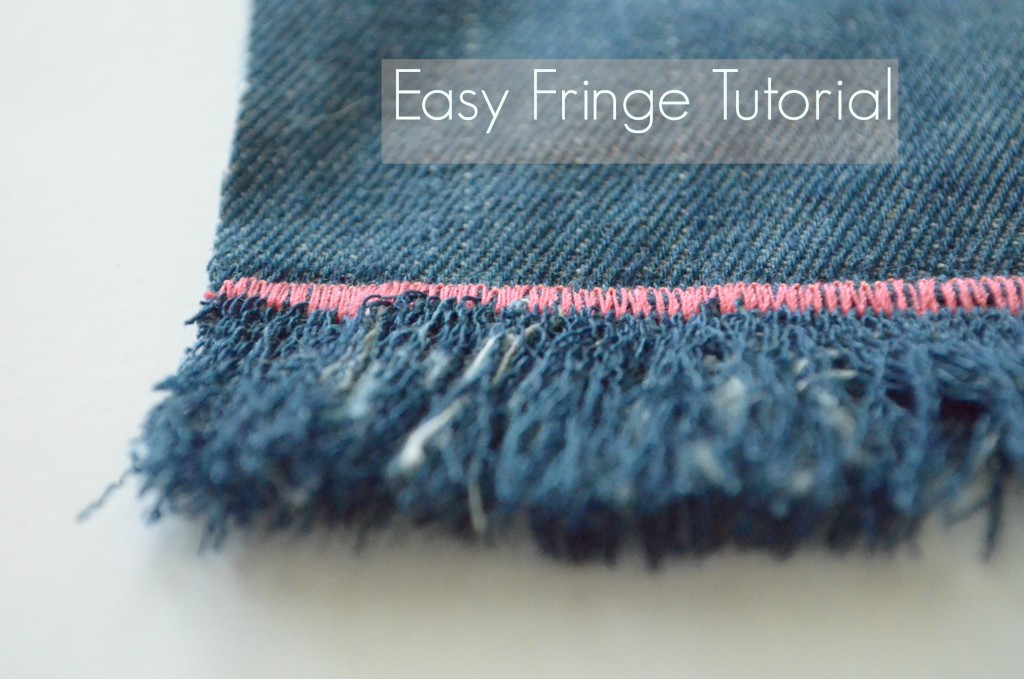
Hello and Welcome to my blog. This is the Tutorial: Fringe 101
If this is your first time in our blog, remember to check our FREE SEWING PATTERNS page.
On that page you will find our collection of free sewing patterns for women, kids and men.
You can also visit our SEWING TUTORIALS and our SEWING REVIEWS.
We also have an ETSY STORE, where you will find unique and modern sewing pattern for women.
Today’s tutorial is about how to make an easy, trendy fringe to add to your fave project.
Fringe has become very popular in the last couple of months. It has revitalized the 70’s style, but with a modern view.
The inspiration for this tutorial?
Cute, isn’t 😉
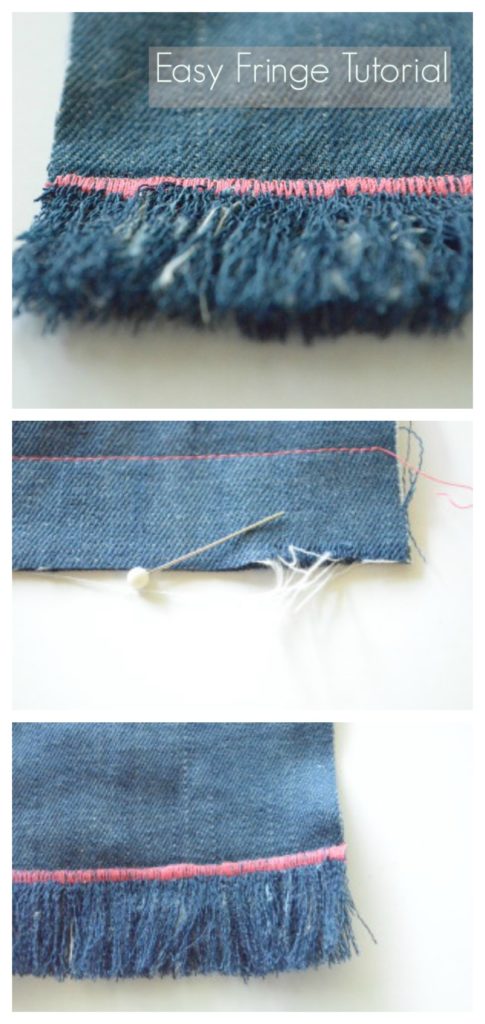
Ok, so let’s check on the step by step tutorial on how to get a clean, beautiful fringe.
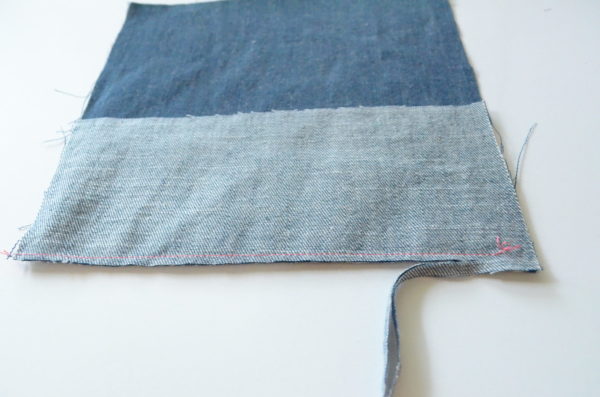
1. Place the pattern piece you would like to add some fringe and the facing (at least 4 inches long)
TIP: remember that we will be cutting two inches from the bottom , so if you are making a top, add the extra inches to the original piece. 2. Sew along the edge by 3/8 inch.
3. Press flat.  4. Under-stitch the facing by making a horizontal line on the facing piece, 1/8 inch away from the original seam.
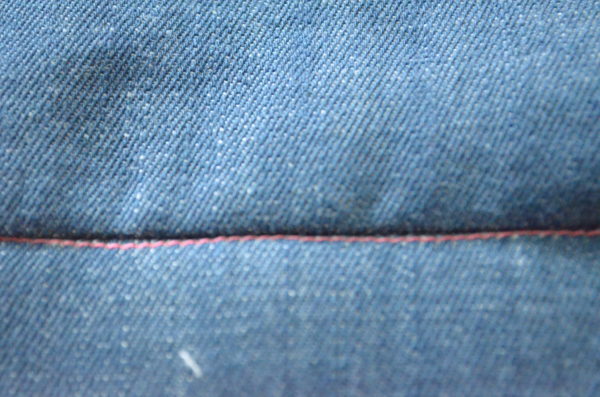 5. Turn the facing and press flat. Sew along the edge by 1/2 inch, then sew a parallel line where the fringe will start (I made mine 1 1/4 inch apart)
 6. Cut the bottom line.
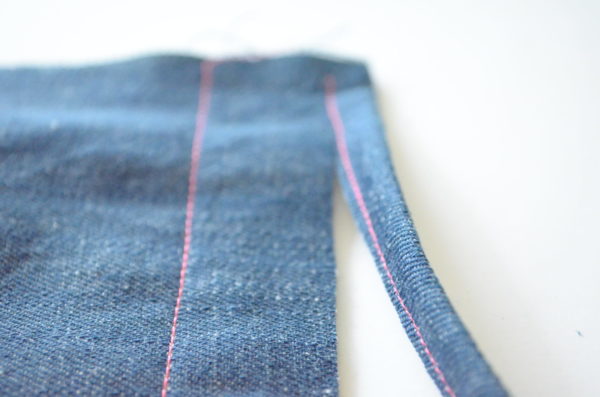 7. Then, grab a pin and start unraveling the threads.
It will take some time, but the results are worthy. 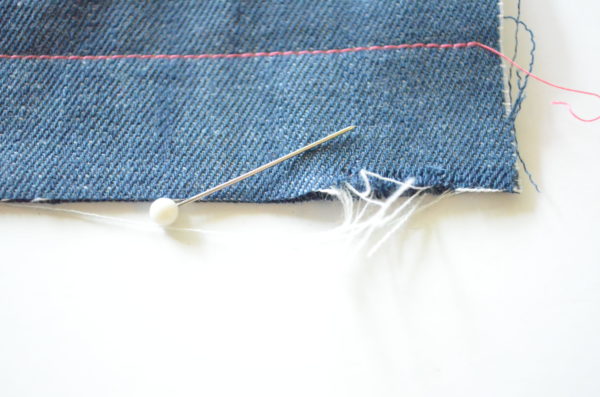 8. Then, trim the fringe by 1/4 inch, so you will have a clean finish.
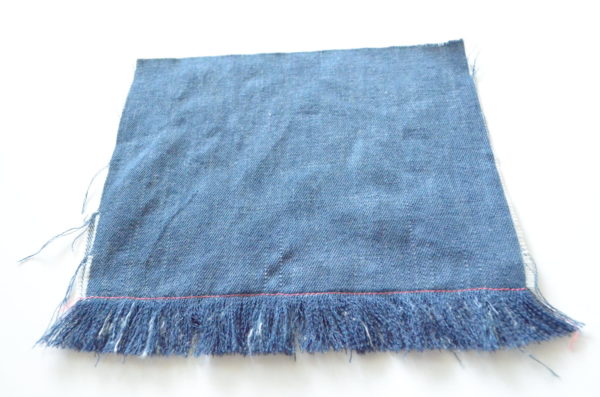 9. To add some color, I decided to make a satin stitch (zig-zag stitch 5.0 length by 04 width)
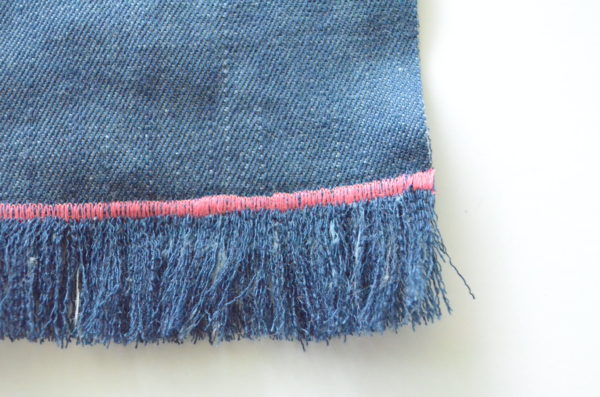 And it is ready.
I am thinking of making a cute bag and a nice linen top 🙂
What would you do?