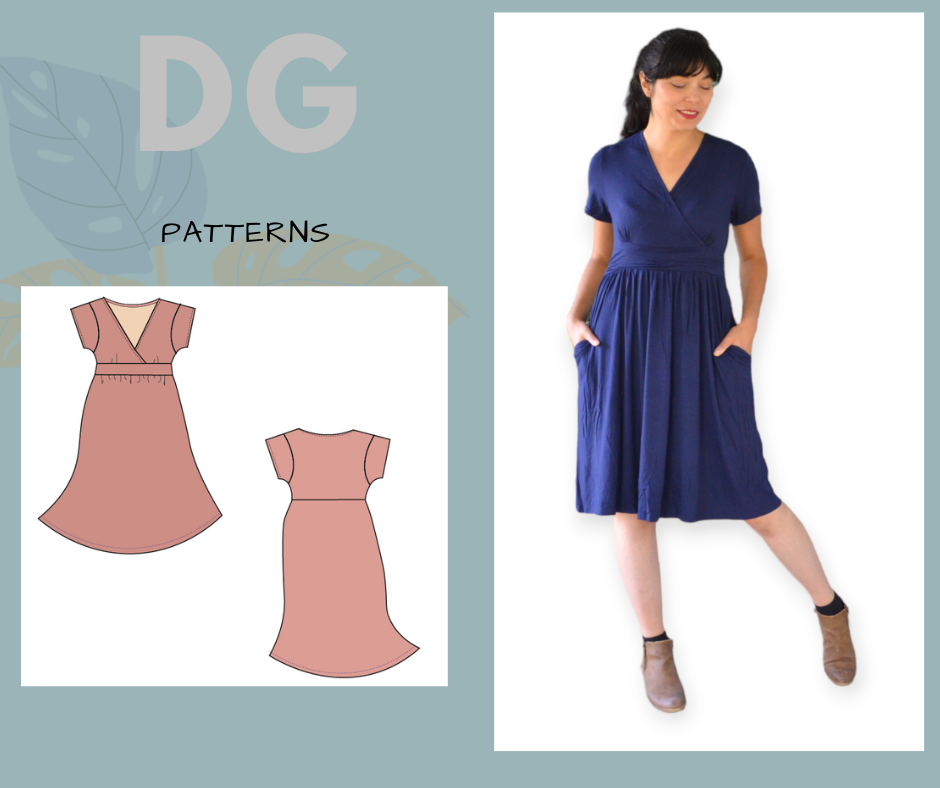
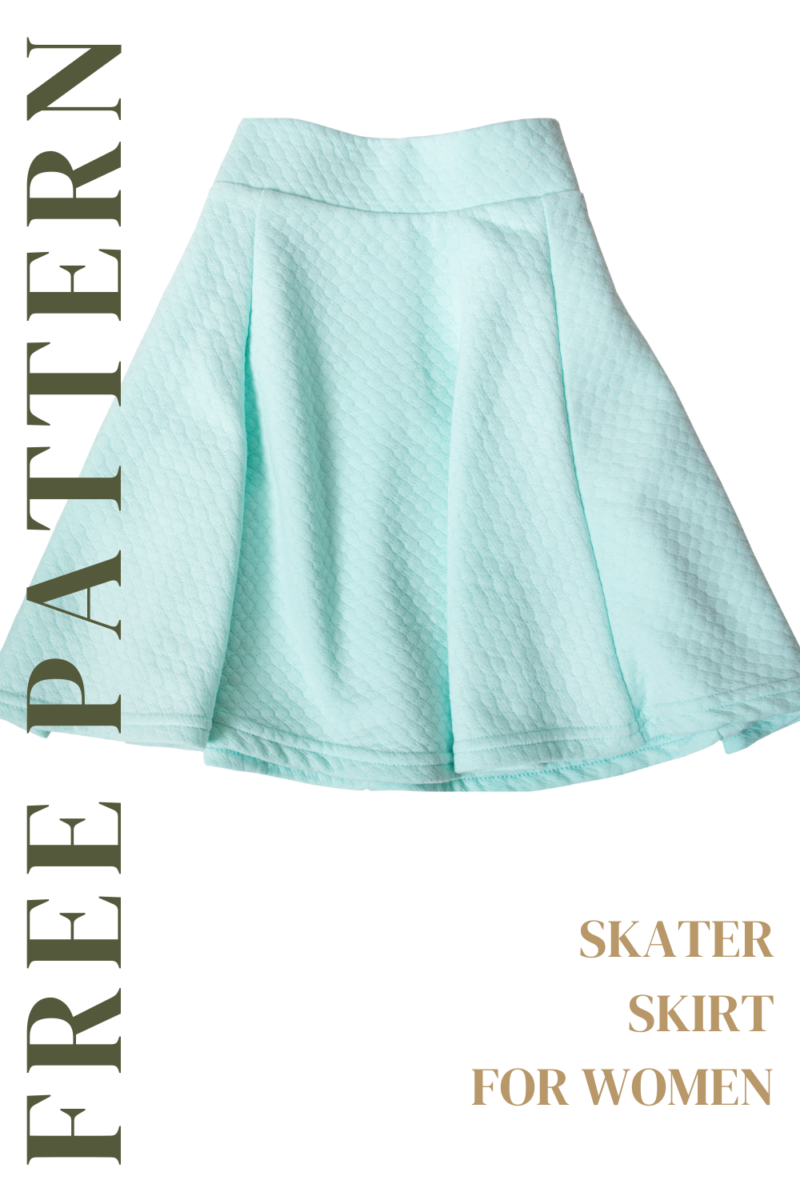
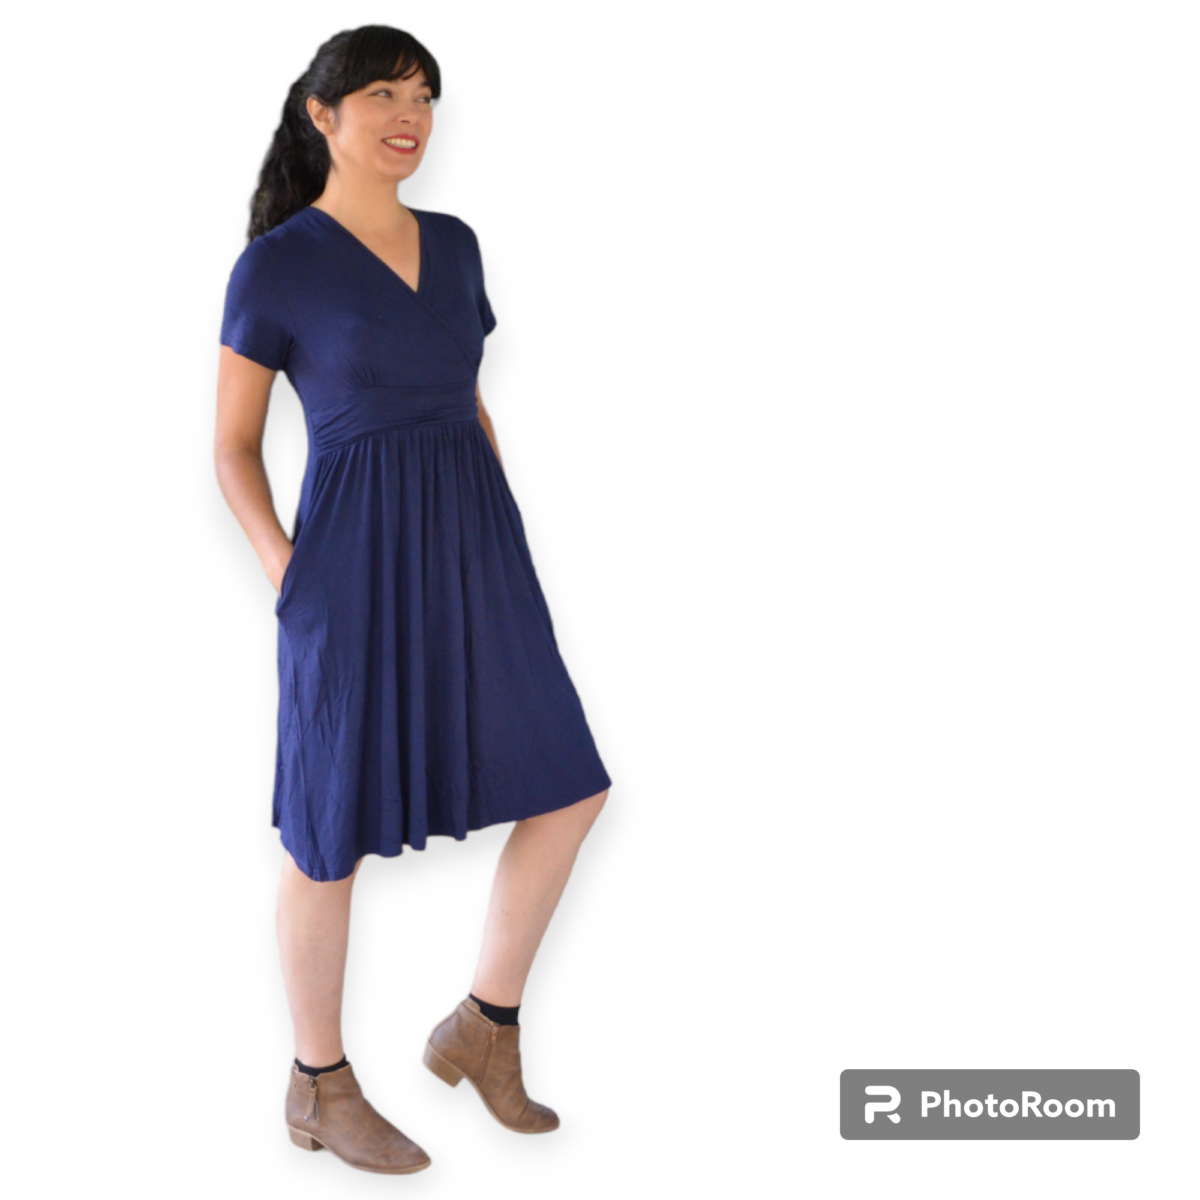
• Skip to main content
  • Skip to primary sidebar

On the Cutting Floor: Printable pdf sewing patterns and tutorials for women

Online Printable PDF sewing patterns for beginners, crafts and printables for kids

Home » PDF SEWING PATTERNS

PDF SEWING PATTERNS

Alicia Jacket Sewing Tutorial

April 15, 2026 by Daniela Leave a Comment

Created with clean lines and a relaxed silhouette, this jacket pairs beautifully with dresses, jeans, or tailored looks. The open front design allows for easy styling, while the soft structure keeps it comfortable enough for daily wear. Whether you choose cozy knits for cooler seasons or lightweight fabrics for spring and fall, this pattern adapts perfectly to your personal style.

We designed this pattern to be approachable, enjoyable, and rewarding to sew. Clear construction steps help you focus on creativity while building confidence in garment making. It’s an excellent project for beginners ready to expand their skills, as well as experienced makers looking for a quick and satisfying sew.

Best of all, this jacket pattern is completely free to download on our website. Simply download, print, and start creating your own handmade staple.

At On the Cutting Floor, we believe sewing should be accessible, inspiring, and fun. Download the pattern today and enjoy crafting a jacket you’ll reach for again and again — made by you, for you.

1.

Bring the front bodice pieces to the table and close the bust darts.
Press the darts downward toward the waist.
Make sure both sides are symmetrical and well pressed.


2.

Place the front and back bodice pieces right sides together.
Align the shoulder seams carefully and pin in place.
Stitch the shoulder seams with a 3/8 inch seam allowance and press the seams open.


3.

Join the side seams by placing the front and back bodice right sides together.
Pin along the sides, matching the armholes and waistline.
Stitch using a 3/8 inch seam allowance and press the seams toward the back.

4.

Bring the sleeves to the table and close the elbow darts.
Fold each sleeve in half, right sides together, and press flat.
Stitch the sleeve seam with a 3/8 inch seam allowance.
Double fold the cuffs with a 3/8 inch seam allowance and press.
Topstitch the cuffs using a 1/8 inch seam allowance.


5.

Bring the back bodice to the table.
Close the shoulder darts and press them toward the center back.


6.

Unfold the bodice and press carefully to set the shape.

7.

Bring the front jacket and back jacket pieces to the table.
Place them right sides together, aligning the shoulders and side seams.
Stitch the shoulder seams and the side seams with a 3/8 inch seam allowance.
Press the seams flat.


8.

Repeat the process on the opposite side.
Insert the sleeve into the armhole, right sides facing.
Match notches and underarm seams, then pin in place.
Stitch the sleeve to the bodice using a 3/8 inch seam allowance.


9.

Open the coat and lay it flat on the table.
Bring the upper seam together with right sides facing.
Align edges carefully and stitch using a 3/8 inch seam allowance.
Press the seam neatly.

13.

Insert the sleeves into the jacket, matching notches and underarm seams.
Stitch using a 3/8 inch seam allowance.
Turn the garment to the right side and press carefully.


14.

Bring the straps to the table.
Place the strap pieces right sides together and align all edges.
Pin in place.


15.

Stitch around all sides, leaving an opening at the top approximately 4 inches wide for turning.
Trim corners, turn the strap right side out, and press flat.

Filed Under: Sewing

The Alicia Jacket PDF sewing pattern

April 8, 2026 by Daniela Leave a Comment

THE PATTERN FEATURES
A gorgeous loose-fit jacket features a front collar with a high hip length.
The jacket also highlights an optional waist belt
MEASUREMENT

Please, select your cardigan with this chart
The patterns have 2’’ ease at the bust point for the jacket and it is designed for a B-cup
The pattern has a 3/8 inch seam allowance.

MATERIALS

  1. FROM 2 1/2 YARDS OF STABLE MEDIUM WEIGHT woven FABRIC
  2. COORDINATING POLYESTER THREAD

LEVEL: Confident Beginners

RECOMMENDED FABRIC

Medium to heavy woven fabrics

 
THE FILE CONTAINS:
A PDF downloadable pattern for A4 and Letter page format.
A fully illustrated, easy-to-follow tutorial with all the information required to create this pattern.
This pattern is delivered IN YOUR ORDER.
You will receive the following PDF files:
Fully graded PDF Patterns are available in sizes from 4 to 30  for the JACKET
Step-by-step illustrated Sewing Tutorial and printing instructions: 17 pages

Filed Under: Sewing

Sewing tutorial: How to sew a Curved Hemline

April 6, 2026 by Daniela Leave a Comment

There is a quiet kind of joy that lives in sewing — the kind that begins with a simple piece of fabric and ends with something beautiful, wearable, and deeply personal. If you love sewing, you already know the feeling: sitting at your sewing machine, listening to the steady rhythm of stitches forming, watching flat fabric slowly transform into dresses, blouses, and garments that carry your creativity in every seam.

Many people start sewing because they want to create something unique. Maybe it begins with hemming a pair of pants, fixing a neckline, or adjusting a favorite dress so it fits just right. And somewhere along the way, sewing becomes more than a hobby. It becomes a form of expression, a creative escape, and sometimes even a moment of calm in a busy day.

One detail that often separates homemade garments from professional-looking pieces is the way curves are sewn. Curved seams appear everywhere — in elegant necklines, flowing dresses, rounded hems, sleeves, collars, and facings. They shape garments so they move naturally with the body. Yet for many sewists, curved seams can feel intimidating at first. Fabric shifts, wrinkles appear, and suddenly what seemed easy becomes frustrating.

If that sounds familiar, you are not alone.

Every person who learns sewing eventually asks the same question: How to sew a smooth curve? How to make a neckline lie flat? How to create beautiful hemlines that look polished and intentional? How to guide fabric under a sewing machine without puckers or tension?

The truth is wonderfully encouraging — curved seams are not difficult once you understand the process. With the right technique, a little patience, and a clear sewing tutorial, anyone can master them. Sewing curves is less about perfection and more about understanding how fabric behaves. Once you learn how to control it, sewing becomes easier, more enjoyable, and incredibly rewarding.

This tutorial was created for sewists who want to elevate their projects — whether you are making your first dress or refining skills you’ve practiced for years. Think of it as a friendly guide beside your sewing machine, showing you step by step how to handle curved seams with confidence.

Imagine working on a dress you truly love. You carefully cut the pattern, pin the pieces together, and sit down ready to sew. The moment arrives when you reach the neckline or curved hem. Instead of hesitation, you feel prepared. You know how to guide the fabric gently, how to clip the seam allowance, how to press each step so the curve naturally falls into place.

That transformation — from uncertainty to confidence — is exactly what this sewing tutorial is about.

Sewing is often described as a practical skill, but those who sew know it is also emotional. Each project tells a story. Maybe you are creating dresses for yourself because you can never find exactly what you want in stores. Maybe you sew for your children, your friends, or special occasions. Maybe you simply enjoy the peaceful focus that comes from creating something with your hands.

And let’s be honest: there is something magical about wearing clothing you made yourself. A handmade neckline sits differently. A carefully finished hemline feels intentional. The garment reflects patience, creativity, and care.

Curved seams play a huge role in that magic.

They give dresses their softness.
They shape necklines so they frame the face beautifully.
They allow fabric to flow instead of pulling or twisting.
They turn simple sewing projects into garments that look professionally made.

In this easy sewing tutorial, you will learn how to sew curved seams step by step. Each image guides you through the process in a clear and visual way, making it accessible for beginners while still valuable for experienced sewists who want cleaner results.

You will see how small adjustments make a big difference:

• Preparing the fabric before sewing
• Guiding curves smoothly through the sewing machine
• Clipping seam allowances to release tension
• Pressing correctly — one of the most important and often overlooked sewing steps
• Turning and shaping the fabric so curves lie flat
• Checking your work to achieve a polished finish

These techniques are the secret behind elegant dresses, smooth necklines, and professional hemlines.

One of the beautiful things about sewing is that improvement happens quickly. The more you practice, the more natural it feels. What once required concentration becomes instinct. Soon, curved seams stop feeling like a challenge and start feeling like an opportunity — a chance to add beauty and sophistication to your work.

This tutorial is designed to make that learning process easy and encouraging. You don’t need advanced tools or complicated equipment. A basic sewing machine, simple sewing supplies, and a willingness to learn are all you need.

Whether you sew occasionally or spend hours creating garments every week, mastering curved seams opens new creative possibilities. You may find yourself experimenting with new dress designs, trying different necklines, or confidently tackling patterns you once avoided.

And perhaps most importantly, sewing becomes more enjoyable.

Because sewing is not only about the finished garment. It is about the experience — choosing fabric, hearing the hum of the sewing machine, pressing seams, and watching your vision come to life one stitch at a time.

So take a moment, prepare your workspace, and join this step-by-step journey. Let this tutorial guide you through an easy, clear, and satisfying process that helps you create beautiful curves, elegant dresses, and flawless hemlines.

If you love sewing, if you enjoy learning how to improve your skills, and if you believe handmade clothing carries a special kind of beauty, this tutorial is for you.

Let’s sew something beautiful together.

HOW TO SEW A CURVED HEMLINE:

Filed Under: Sewing

  • « Go to Previous Page
  • Page 1
  • Page 2
  • Page 3
  • Page 4
  • Interim pages omitted …
  • Page 326
  • Go to Next Page »

Primary Sidebar

RSS On the Cutting Floor: Printable pdf sewing patterns and tutorials for women

  • ROUNDUP: Free sewing patterns for summer outfits
  • FREE SEWING PATTERNS: 10 Easy skirts
  • FREE SEWING PATTERNS: 10 Spring Outfit ideas
  • Alicia Jacket Sewing Tutorial
  • The Alicia Jacket PDF sewing pattern
  • Advertise with Us!
  • Contribute – On the Cutting Floor
  • Income
  • SITEMAP

Copyright © 2026 · Genesis Sample on Genesis Framework · WordPress · Log in