Hello there,
Thank you for visiting On the Cutting Floor. This is the Sewing Tutorial: Circus Finger Puppets
If this is your first time in our blog, remember to check our FREE SEWING PATTERNS page.
On that page you will find our collection of free sewing patterns for women, kids and men.
You can also visit our SEWING TUTORIALS and our SEWING REVIEWS.
We also have an ETSY STORE, where you will find unique and modern sewing pattern for women.
Hi, Alicia from Felt With Love Designs here again!
I am continuing my circus toy theme today with the first set in a series of circus finger puppets. If you missed my first post, be sure to check out the seal softie I shared last month.
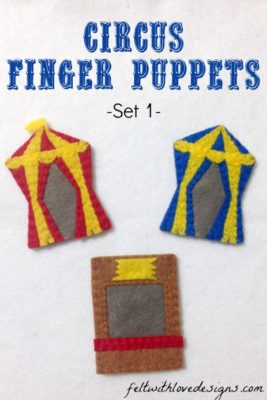
I am starting the series with a set of circus “buildings” and will continue with some characters, animals, and vehicles so be sure to follow along!
Supplies needed:
- The Pattern
- Felt (red, yellow, blue, black/dark grey, brown)
- Embroidery thread to match
- Scissors (these* are my favorite for cutting precisely)
- Freezer paper (optional – see my tutorial on using freezer paper to precisely cut your pattern)
Circus Finger Puppets
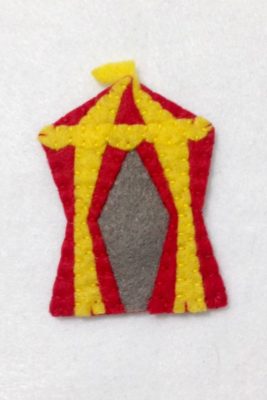
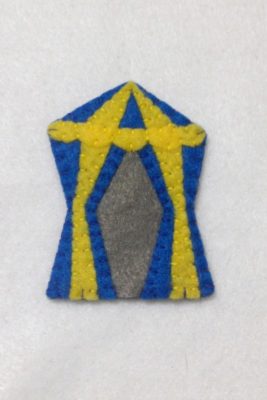
To sew the circus tent puppet:
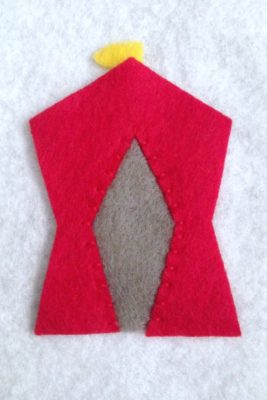
- Cut all of the pieces from felt
- Position the red (or blue) curtains over the black/dark grey background piece and sew the inside portion of the curtains down
- Sew the flag between the curtain piece and the background piece (optional – I included it in the red one but not in the blue one.)
- Sew the yellow stripes onto both sides of the curtain
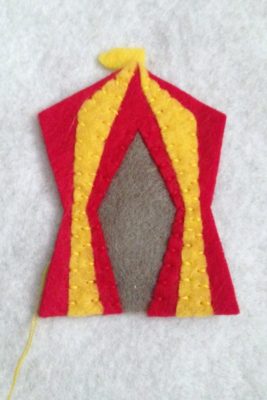
- Sew the yellow banner across the top of the tent

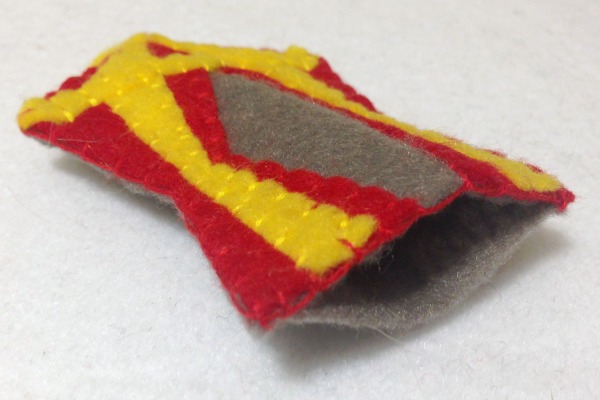
- Match up the embellished front with the back and stitch them together, using a blanket stitch, leaving the bottom open. I also go back and stitch just the front edge of the opening with a blanket stitch to reinforce it but that is totally optional.
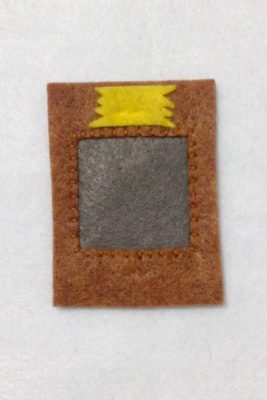
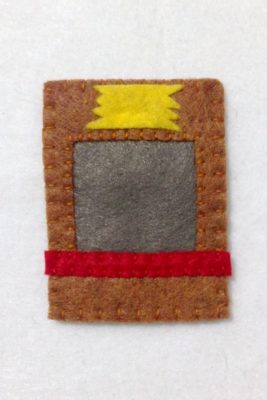
To sew the ticket booth puppet:
- Cut all of the pieces from felt
- Sew the brown frame to the black/dark grey background piece
- Glue the yellow ticket sign to the top of the brown frame (or sew – I chose to glue this piece to save a few moments because of the jagged edges.)
- Sew the red counter to the front of the frame
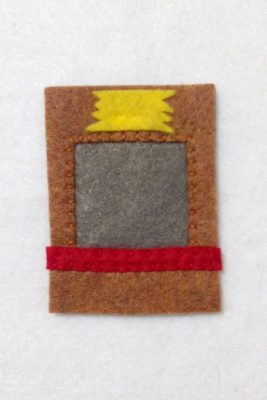
- Match up the embellished front with the back and stitch them together, using a blanket stitch, leaving the bottom open. I also go back and stitch just the front edge of the opening with a blanket stitch to reinforce it but that is totally optional.

I hope you enjoyed these simple finger puppets! Be sure to come back and check out the rest of the series!
If you are looking for a little Valentine’s fun, I would also recommend these Valentine’s baby bibs I sewed for So Sew Easy and if you are interested in more finger puppets, head over to Felt With Love Designs and browse our finger puppet archive!
If you use this pattern to make your own version, I would love to see it! Come by and share on the Felt With Love Designs Facebook page or tag me (@feltwithlovedesigns) on Instagram!
~Alicia
*affilate link