Hello everyone!I am glad to share this technique with you today. As you have probably noticed, I really like circle skirts. I have used them for the Arizona dress, the Amalia dress and more recently for the Paula dress.
I also love peplum tops. A lot! :)All those hemline projects can be finished by adding a bias tape ( the Peplum top pattern) or by using a narrow edge serger stitch (the Maria Dress pattern).However, not everybody has a serger or like the idea of the bias tape.That is why I wanted to add this tutorial with a simple way to make a round hem.Here we go :1. Place your sewing machine stitch length in the highest number.
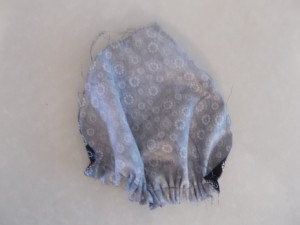
2. Stitch along the hem. This will make the fabric to gather.
2. Stitch along the hem. This will make the fabric to gather.
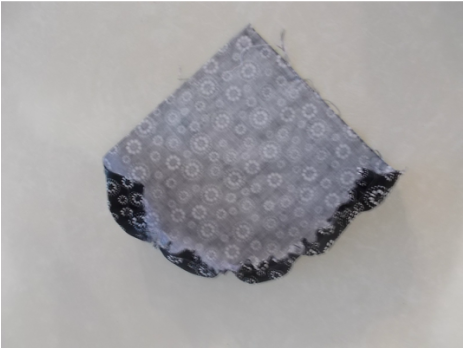
3. Fold the hemline by 1/2 inch.
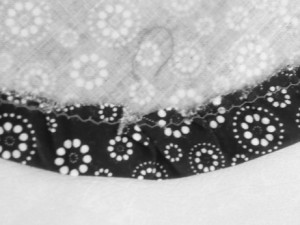
4. Press the hemline with an iron. Release the gatherings and adjust them to the hemline.
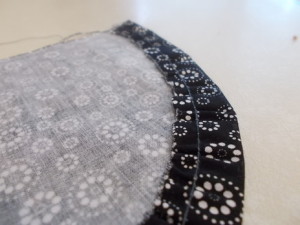
5. Make a zig-zag stitch at the edge of the hemline. Press flat.
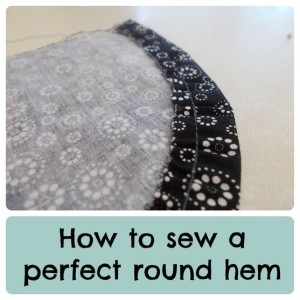
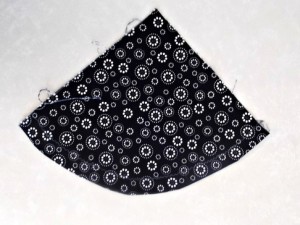
And this is how it will look like 🙂
I hope you have enjoyed this tutorial. I found this technique pretty simple, but I know there are others out there.How do you make your round hemlines?Do you have a favorite technique?
Its realy a good idea I realy appreciate your way
Thank you soo much
I’ll try it soon
Ank you again I realy love it ♥
Thank You!
Amazing!!!! Thanks for the help
Thanks Louiza!
Thanks a lot.I really like it.
To avoid having to gather and hem a round edge, if an facing would be appropriate, I will almost always use a facing. By placing original fabric and facing right sides together to cut them out, one will be able to sew the rounded hem (taking into account necessary hem length) with the fabrics in the same position….right sides together. Trim, clip small triangle cuts (notches) along raw edge, turn and press. This creates a nice finish, “slip” or shadow panel and no raw edges to deal with at the hem.
Hi Debra,
Thank you so much for the tip!
Good Ideas. Percolates the mind. Thanks
Are you leaving the edge raw? Bias tape or serging the edge would be better.
Hi Bonny,
Thanks for your comment. You are right, the edge will need finishing for sure. It was just a post to put the topic on the table and share ideas. I have found amazing tips through this post! I would love to add some updating pictures with other techniques in the future.
Happy Sewing!
I usually just cut 1/2 in longer than needed, run the edge thru the surger, then do a narrow rolled hem. (shirt tail hem) especially if hemming a dress or skirt… Easy to get a perfect shirt tail hem when you run it thru the surger first
Thanks for your comment Betty. It is true, I would not live without my serger 😉
Happy Sewing!
When I did my apprenticeship in a couture house we were taught to mark the final hemline with tacking thread fold and tack close to fold,neaten raw edge with hand oversewing,pulling it slightly to gather excess fabric until it lies flat,once done it was pressed to shrink excess ,if fabric would shrink or iron to flatten gathers,always remembering to place cardboard or cloth between edge of hem and the dress so as not to leave an impression on the right side of fabric,once hem has cooled and dried if steam was used then blind stitch or herringbone in place depending on weight of fabric..Of course hand sewing can be replaced with serging or zig zag on the machine.Always remove tacking threads before dry pressing after steaming so as it does not leave the thread marks on right side of fabric,so damp press,remove tacking and dry press.DO not press the gathered edge of hem once stitched in place as this will mark the right side of fabric,(leaves an indentation line) use a steamer while dress is hanging if need to.We also did the stitch and turn through method as well (like a facing) or on very fine fabrics we would do a hand rolled hem and hand stitch in place.
Hi Mary,
Thank you for your comment 🙂
Used this technique recently to make a circle poodle skirt for a little 3 year old. I was thrilled at how well it worked. Thank you so much for sharing! Can’t wait to give it another try!