• Skip to main content
  • Skip to primary sidebar

On the Cutting Floor: Printable pdf sewing patterns and tutorials for women

Online Printable PDF sewing patterns for beginners, crafts and printables for kids

Home » Easy sewing tutorial » Page 9

Easy sewing tutorial

Sewing Tutorial: how to make an easy Bermuda short for kids

February 16, 2016 by Daniela Leave a Comment

Hello there,


Thank you for visiting On the Cutting Floor today.  This is the Sewing Tutorial: how to make an easy Bermuda short for kids

If this is your first time in our blog, remember to check our FREE SEWING PATTERNS page.

On that page you will find our collection of free sewing patterns for women, kids and men.

You can also visit our SEWING TUTORIALS and our SEWING REVIEWS.

We also have an ETSY STORE, where you will find unique and modern sewing pattern for women.

You can also sign up for our newsletter on the sidebar of this post, so you will never miss a post!

Sewing Tutorial: how to make an easy Bermuda short for kids

For the full pattern, please visit this page

Instructions
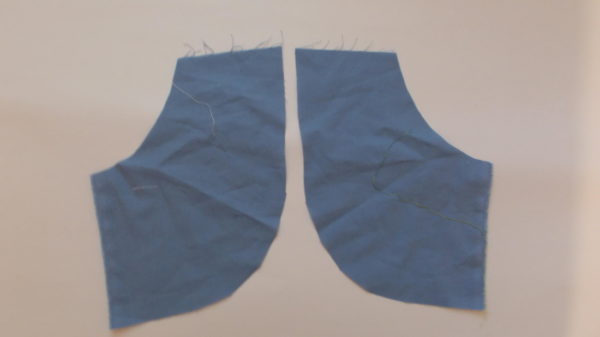
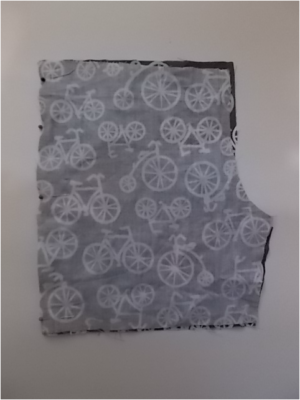
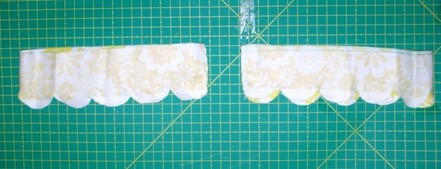
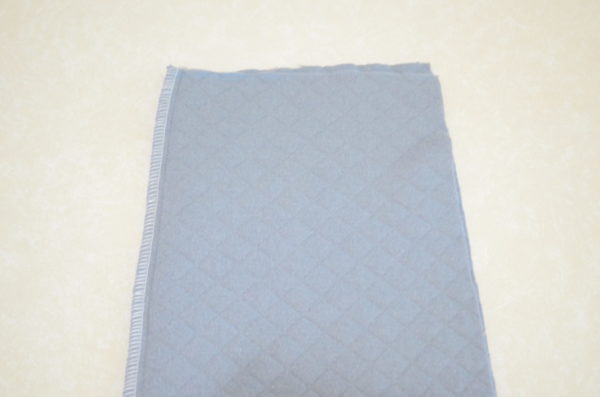
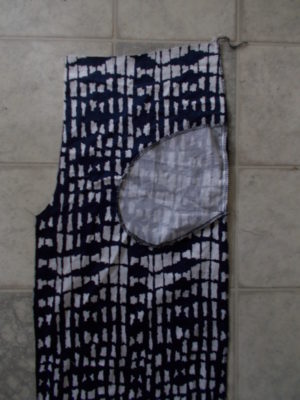
1. Let’s start with the pockets.

Picture

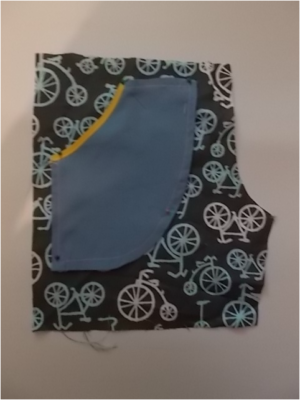
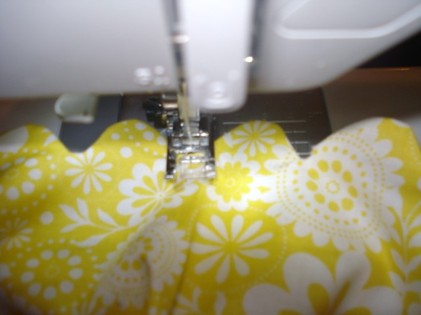
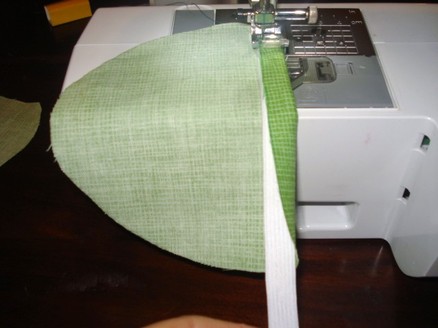
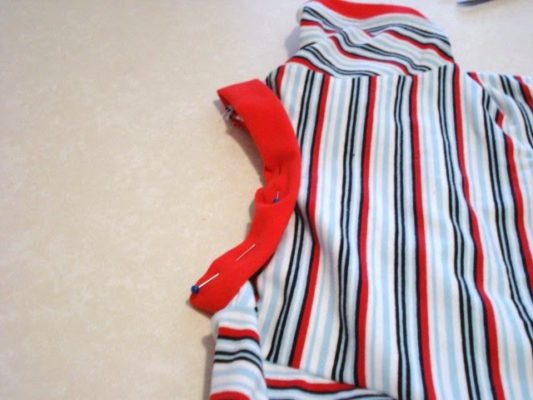
2.  Place the bias tape on the pocket area, as shown in the picture below.  Sew along.

Sewing Tutorial: how to make an easy Bermuda short for kids

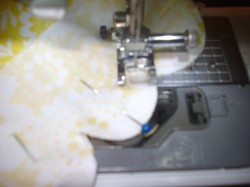
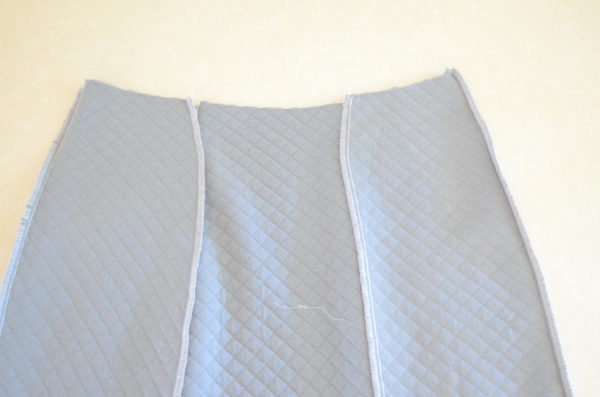
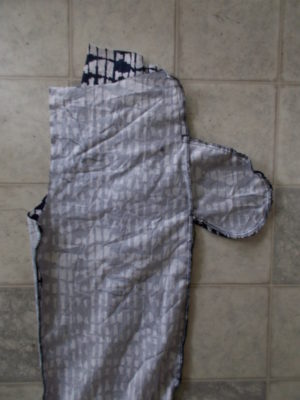
3. Fold and pin the edges of the pockets.  Sew along.

Picture

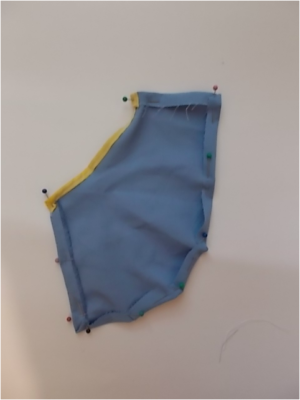
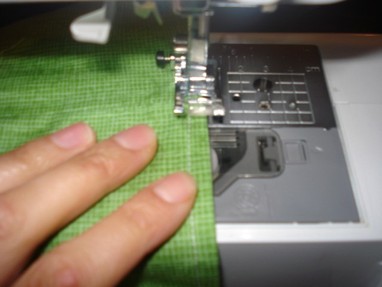
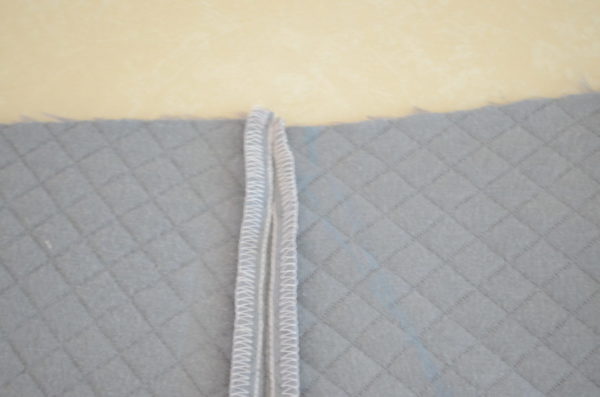
4. Pin the pocket to the shorts and sew along the edges, it will make a second seam line on it.

Picture

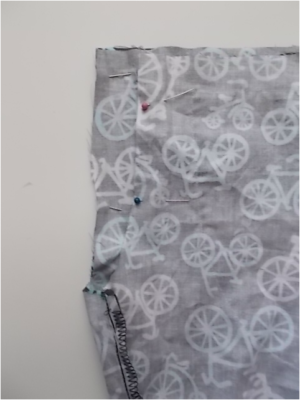
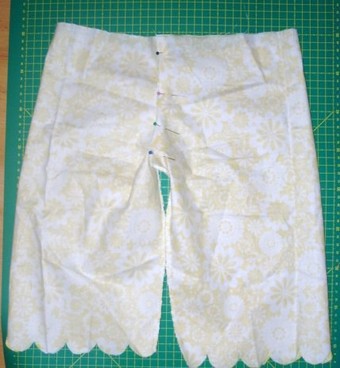
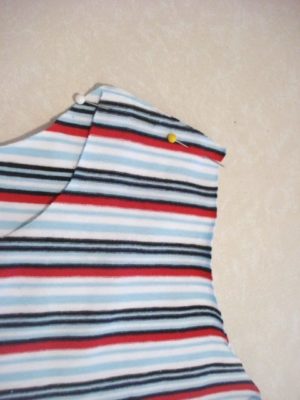
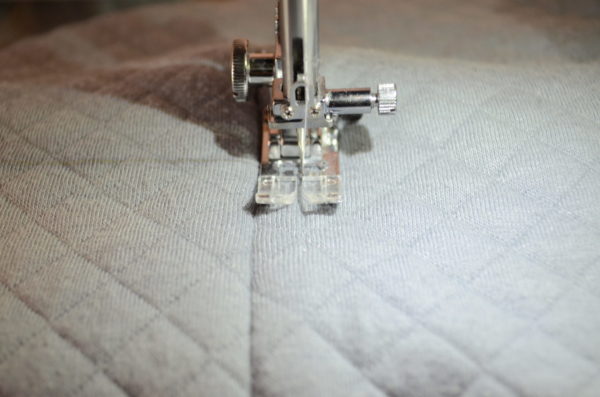
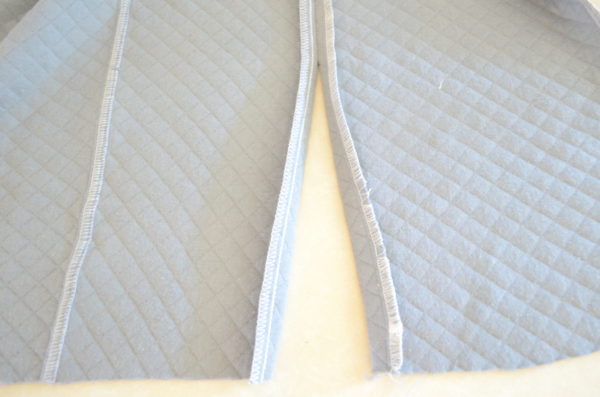
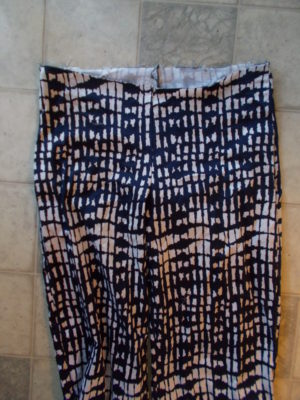
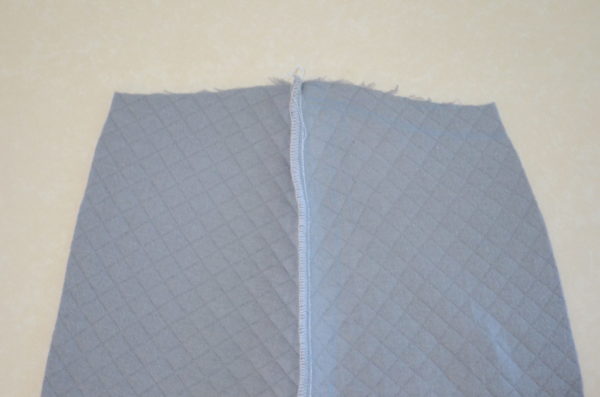
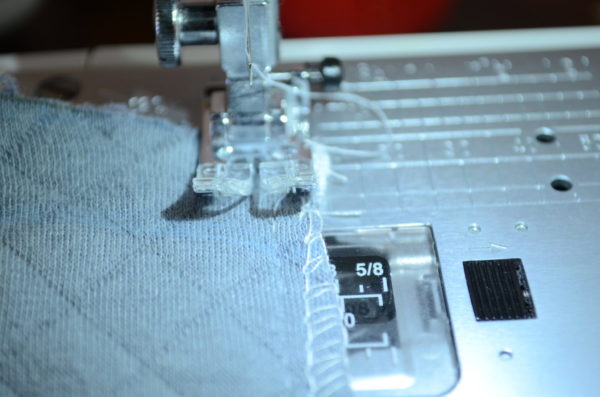
5. FOLD front and back of the short legs together.  Sew along the inner SEAMS.

Picture

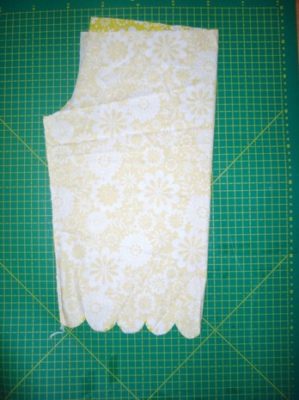
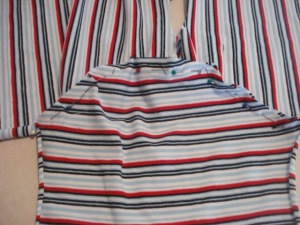
6. Place both legs together and pin the crotch area.  Sew along.

Picture

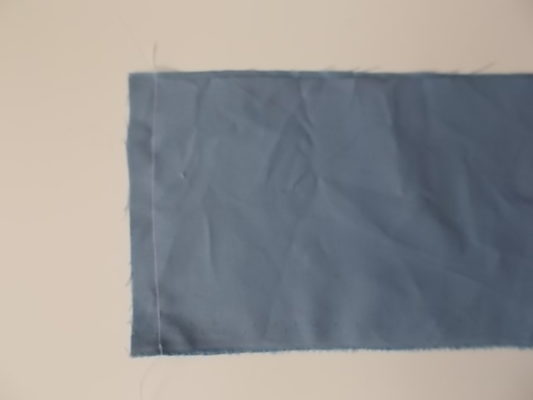
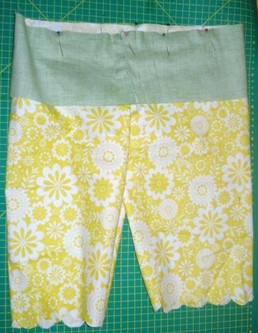
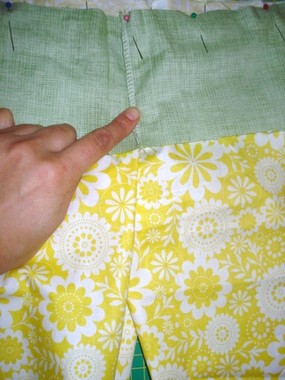
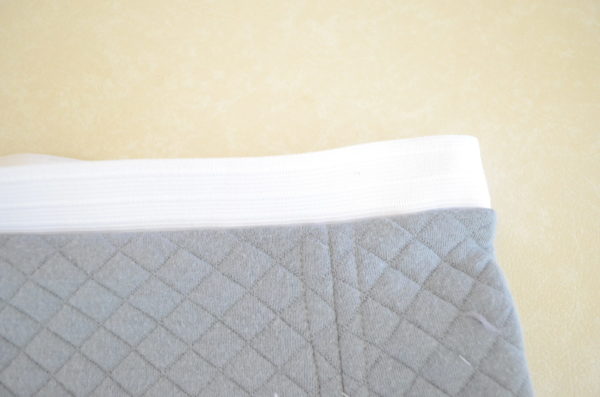
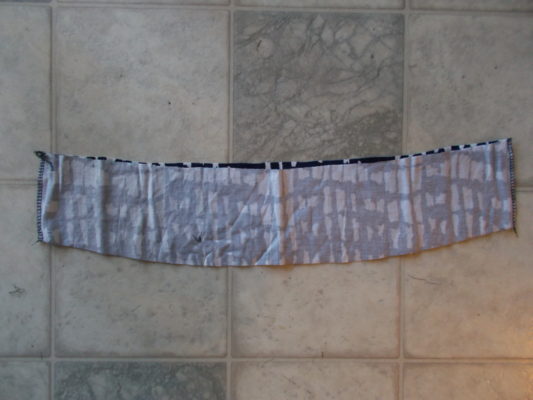
7.  Close the sides of the waistband and hemline strap.

Picture

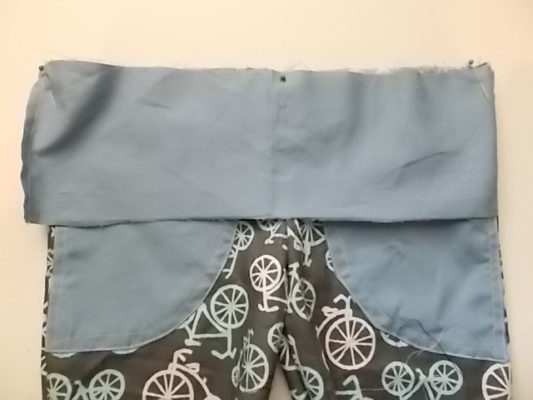
8.  Place the waistband and the shorts together, right sides facing, pin and sew along.  Repeat with the hemline strap.

Picture

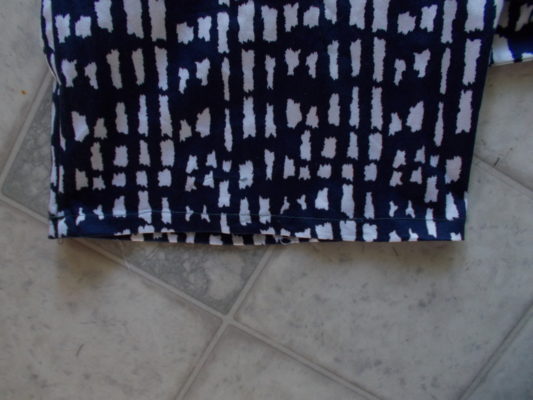
9.  Make the hemline by double folding 1/4 inch of the bottom.

Picture

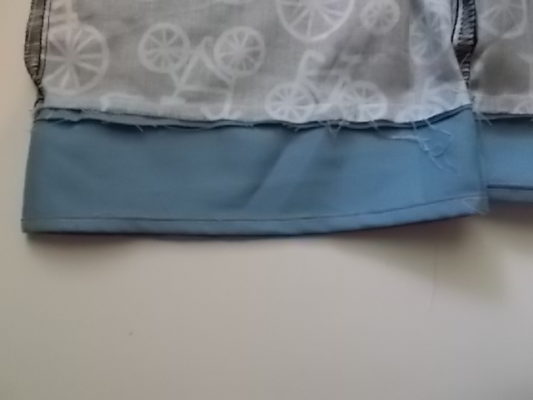
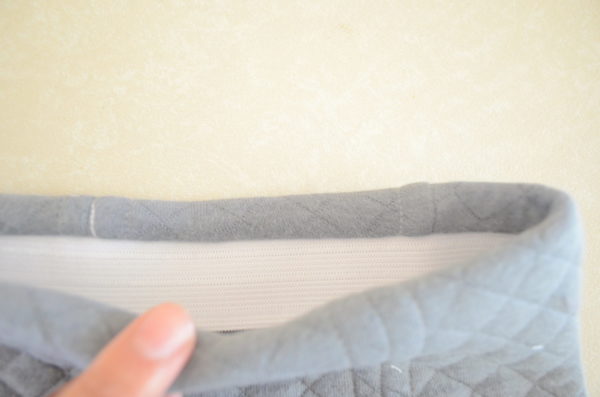
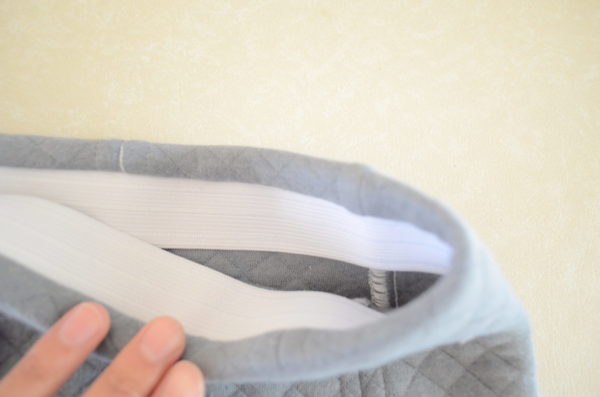
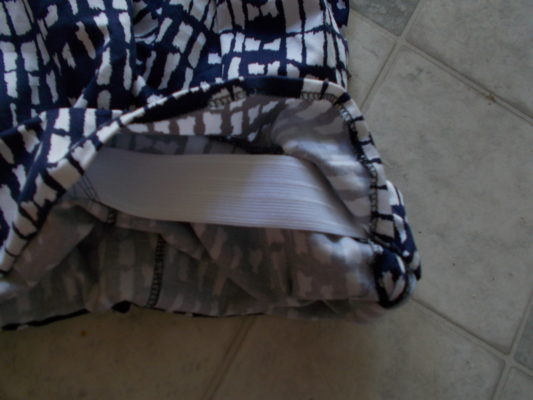
10.  Fold the waistband area and press flat.  Pin and encase the elastic.

Picture

And they are ready to go!
Thank you for visiting our page, and please remember to share with your friends and sewing frieds!
Happy Sewing everyone!


Filed Under: Easy sewing tutorial

sewing tutorial: how to make an easy scallop pants for kids

February 16, 2016 by Daniela Leave a Comment

 Hello there,


Thank you for visiting On the Cutting Floor today.  This is the sewing tutorial: how to make an easy scallop pants for kids

If this is your first time in our blog, remember to check our FREE SEWING PATTERNS page.

On that page you will find our collection of free sewing patterns for women, kids and men.

You can also visit our SEWING TUTORIALS and our SEWING REVIEWS.

We also have an ETSY STORE, where you will find unique and modern sewing pattern for women.

You can also sign up for our newsletter on the sidebar of this post, so you will never miss a post!

This is the tutorial to make an easy pair of scallop pants for kids.
The pattern can be downloaded here

 sewing tutorial: how to make an easy scallop pants for kids

1.  Place front and back leg pieces together and sew the sides:
9957710
2.  Now take the two legs and pin the crotch area.  Then, sew it together.

5545480

3.  Take the waistband and sew the sides of it.

4.  Place the waist band with the pants, right sides facing together.  Pin and sew it.


 6239661
Be careful of placing the seam of the waist and the back seam together as shown below.5.  Turn around and double fold the top of the waist band 1/4 inch.  Pin and sew it.


 9995565
6.  Scallop hemline:  Fold the hemline sides as shown in the picture below.

8604690

7.  Double fold the top of the hemline by 1/4 inch and sew it.8.  Place them with the rest of the pants, right side facing each other.
Pin each scallop and sew it.

7565350


 9.  For better results, choose a shorter stitch length to go through the scallops.When getting to the corner of the scallops, release the presser foot and manually move the pants to face the next curve.
Put the presser foot down again and continue sewing.
 8731991
10.  Now turn them around and iron them thoroughly.  After that,  top stitch the scallops and secure the inner seams by making a few stitches on the area, as shown below.


11.  Shirred waistband:  use regular thread for the spool.12.  And elastic thread at the bottom.  For better results, place the elastic thread manually on the bobbin.  As shown below, I left the elastic thread hanging out from the bobbin case, so it will be easier for the needle to catch it and start shirring.

6953237
The setting for the sewing machine should be the longest stitch length from your machine.


13.  Place the waistband right side facing up the needle, so the elastic thread will show in the inside of the pants.


14.  Start with the first row, very close to the top.  Keep making straight parallel lines with a 1/4 inch space between them.  The shirring will start showing more and more with more lines you make.
15.  Pocket:  Place the pocket and the 1/2 inch elastic on the sewing machine.
Make a few initial stitches to secure the fabric and elastic.  Then, pull the elastic and sew.

9097476

16.  Place the pocket on the pants.  Measure how high should be put it.I personally like the pockets to be a little lower, like the cargo pants, but that is optional. Fold the pocket by 5/8 inch to the inside, pin it in place.Check that the pins are only holding the front of your pants.
Sew it.

sewing tutorial: how to make an easy scallop pants for kids

And they are ready!
Thanks for reading this post.  I hope you enjoy it and let  me know what your think!


Filed Under: Easy sewing tutorial

Sewing Tutorial: how to make an easy Pajama pants

February 16, 2016 by Daniela 3 Comments

[Read more…] about Sewing Tutorial: how to make an easy Pajama pants

Filed Under: Easy sewing tutorial

Easy T-shirt tutorial

February 16, 2016 by Daniela Leave a Comment

Hello there,


Thank you for visiting On the Cutting Floor today.  This is the Easy T-shirt tutorial

If this is your first time in our blog, remember to check our FREE SEWING PATTERNS page.

On that page you will find our collection of free sewing patterns for women, kids and men.

You can also visit our SEWING TUTORIALS and our SEWING REVIEWS.

We also have an ETSY STORE, where you will find unique and modern sewing pattern for women.

You can also sign up for our newsletter on the sidebar of this post, so you will never miss a post!

Easy T-shirt tutorial

Pin the shoulders and sew along.

Pin the shoulders and sew along.

Open the t-shirt as shown in the picture and place the sleeve in the armhole. Pin and sew along - See more at: https://www.onthecuttingfloor.com/classic-30-minutes-t-shirt#sthash.8diMcilG.dpuf
Open the t-shirt as shown in the picture and place the sleeve in the armhole. Pin and sew along

Place the front and back together again and sew the sides of the t-shirt, including the sleeves.


Place the front and back together again and sew the sides of the t-shirt, including the sleeves.


Pin the neckline to the t-shirt. Remember that the neckline needs to be stretch a little, so it places flat on the t-shirt.


Easy T-shirt tutorial
Sew along using a zig-zag stitch. Then cover stitch the areA
Easy T-shirt tutorial
Close the neckline by 5/8 inch seam allowance. Trim the excess fabric leaving 1/8 inch. Press the seam flat.
For the kids t-shirt. Repeat the neckline procedure described before with the sleeve cuffs. For the women's t-shirt. Fold the sleeve 1/2 inch and sew along.
For the kids t-shirt. Repeat the neckline procedure described before with the sleeve cuffs. For the women’s t-shirt. Fold the sleeve 1/2 inch and sew along.

EASY WOMEN SHIRT PATTERN:

DOWNLOAD THE PATTERN NOW

Filed Under: Easy sewing tutorial, Uncategorized

Amy Skirt Tutorial

February 16, 2016 by Daniela Leave a Comment

Hello there,

Thank you for visiting On the Cutting Floor today.  This is the Amy Skirt Tutorial

If this is your first time in our blog, remember to check our FREE SEWING PATTERNS page.

On that page you will find our collection of free sewing patterns for women, kids and men.

You can also visit our SEWING TUTORIALS and our SEWING REVIEWS.

We also have an ETSY STORE, where you will find unique and modern sewing pattern for women.

You can also sign up for our newsletter on the sidebar of this post, so you will never miss a post!

TUTORIAL

  1.  Place side panel and the back center panel together, right sides facing, and sew along.DSC_0055
    2.  Repeat with the other side.


    3.  Open the skirt and press the seams flat open..DSC_0059
    DSC_0061 4.  Top stitch the skirt panels by making a straight line 1/4 inch away from the original seam.DSC_0062

FRONT PANEL:

5.  Repeat the same procedure from the back side of the skirt with the front, except for the  left side seam should stay opened by 7 inches from the bottom.

The seams here must be top stitch in the same way the back side of the skirt was before.

DSC_0063

6.  Place front and back skirt pieces together, right sides facing and sew along the sides.

7.  Fold the elastic in two and sew  it together.

8.  Pin the elastic to the to of the skirt.  It must not stretch.

DSC_00649.  Sew along the top, 1/4 inch away from the seam.

DSC_0065

10. Turn the elastic to the inside of the skirt.DSC_0066 11.  Insert about 1/4 inch of the skirt as well, then stitch on the dish

DSC_0067 DSC_0068

12.  Finish by making a 1 1/2 inch hemline on it.

And that it is ready!  I hope you  like it as much as I do 🙂

Filed Under: Easy sewing tutorial, Uncategorized

Free Sewing Tutorial: How to sew the Casual Pants

February 16, 2016 by Daniela 1 Comment

This is the Free Sewing tutorial for the Casual Pants Pattern; a very easy pair of pants that can be as versatile as beautiful.

I love this pattern because it is easy to make and very flattering.  You can decide to use a solid color fabric for a classic look or a funky and fun fabric for a casual pair of trousers.

This Free Sewing Tutorial will show you a step by step way to make the casual pants.

If you like our patterns, remember to check on our PDF sewing patterns area, our Free Sewing Tutorials and our Sewing reviews.  You will find lots of great information about sewing for beginners with easy to make patterns.

You can also like to visit our Etsy store to find modern, unique PDF printable sewing patterns and tutorials.  Or you can join our weekly newsletter to learn more about our newest PDF pattern released, roundups and giveaways.

Enjoy!


Free Sewing Tutorial: How to sew the Casual Pants

Place the pockets on each pant leg. Follow the marks on the printed pattern –

9293305_orig

Place front and back pant leg pieces together and sew along the sides, including the pockets –

5233412_orig

Attach both legs by sewing along the crotch area.

807923_orig (1)

Waistband: Place front and back waistband pieces and close the sides –

1007144_orig


Place the waistband with the pants. Sew along the top and attach it to the pant legs by top stitch the sides –

5020015_orig

Hand Stitch the bottom of the waistband to the pants, leaving a 4 inch opening to insert the elastic. –

8975974_orig


Insert the elastic on the waistband area and close the opening.

5493596_orig

Finish by making the hemline of your pants 1 inch.


540149_orig
DOWNLOAD THE PATTERN HERE

Filed Under: Easy sewing tutorial, Uncategorized Tagged With: 637

  • « Go to Previous Page
  • Page 1
  • Interim pages omitted …
  • Page 7
  • Page 8
  • Page 9
  • Page 10
  • Go to Next Page »

Primary Sidebar

RSS On the Cutting Floor: Printable pdf sewing patterns and tutorials for women

  • Petunia Skirt PDF sewing pattern and Tutorial
  • Standford Dress PDF sewing pattern
  • Ivonne Knit top PDF sewing pattern
  • The Cony Bouse PDF sewing pattern and sewing tutorial
  • FREE PATTERN: Basic Blouse
  • Advertise with Us!
  • Contribute – On the Cutting Floor
  • Income
  • SITEMAP

Copyright © 2026 · Genesis Sample on Genesis Framework · WordPress · Log in